
How to stream on Twitch with OBS
Live streaming to Twitch with OBS Studio is super easy. You simply need to link OBS to your Twitch account and start streaming. Here’s how to do it:
- Go to the official Twitch website. Click on your avatar on the top right and select Dashboard from the drop-down menu. Next, head to the Settings from the menu on the left and select Stream.
- Copy your Primary Stream Key to the clipboard.
- Download the latest stable version of OBS Studio from the official website and install the software.
- Let the Auto-Configuration Wizard optimize the software’s settings based on your hardware.
- The next step is to go to the Settings in the bottom-right corner of the screen.
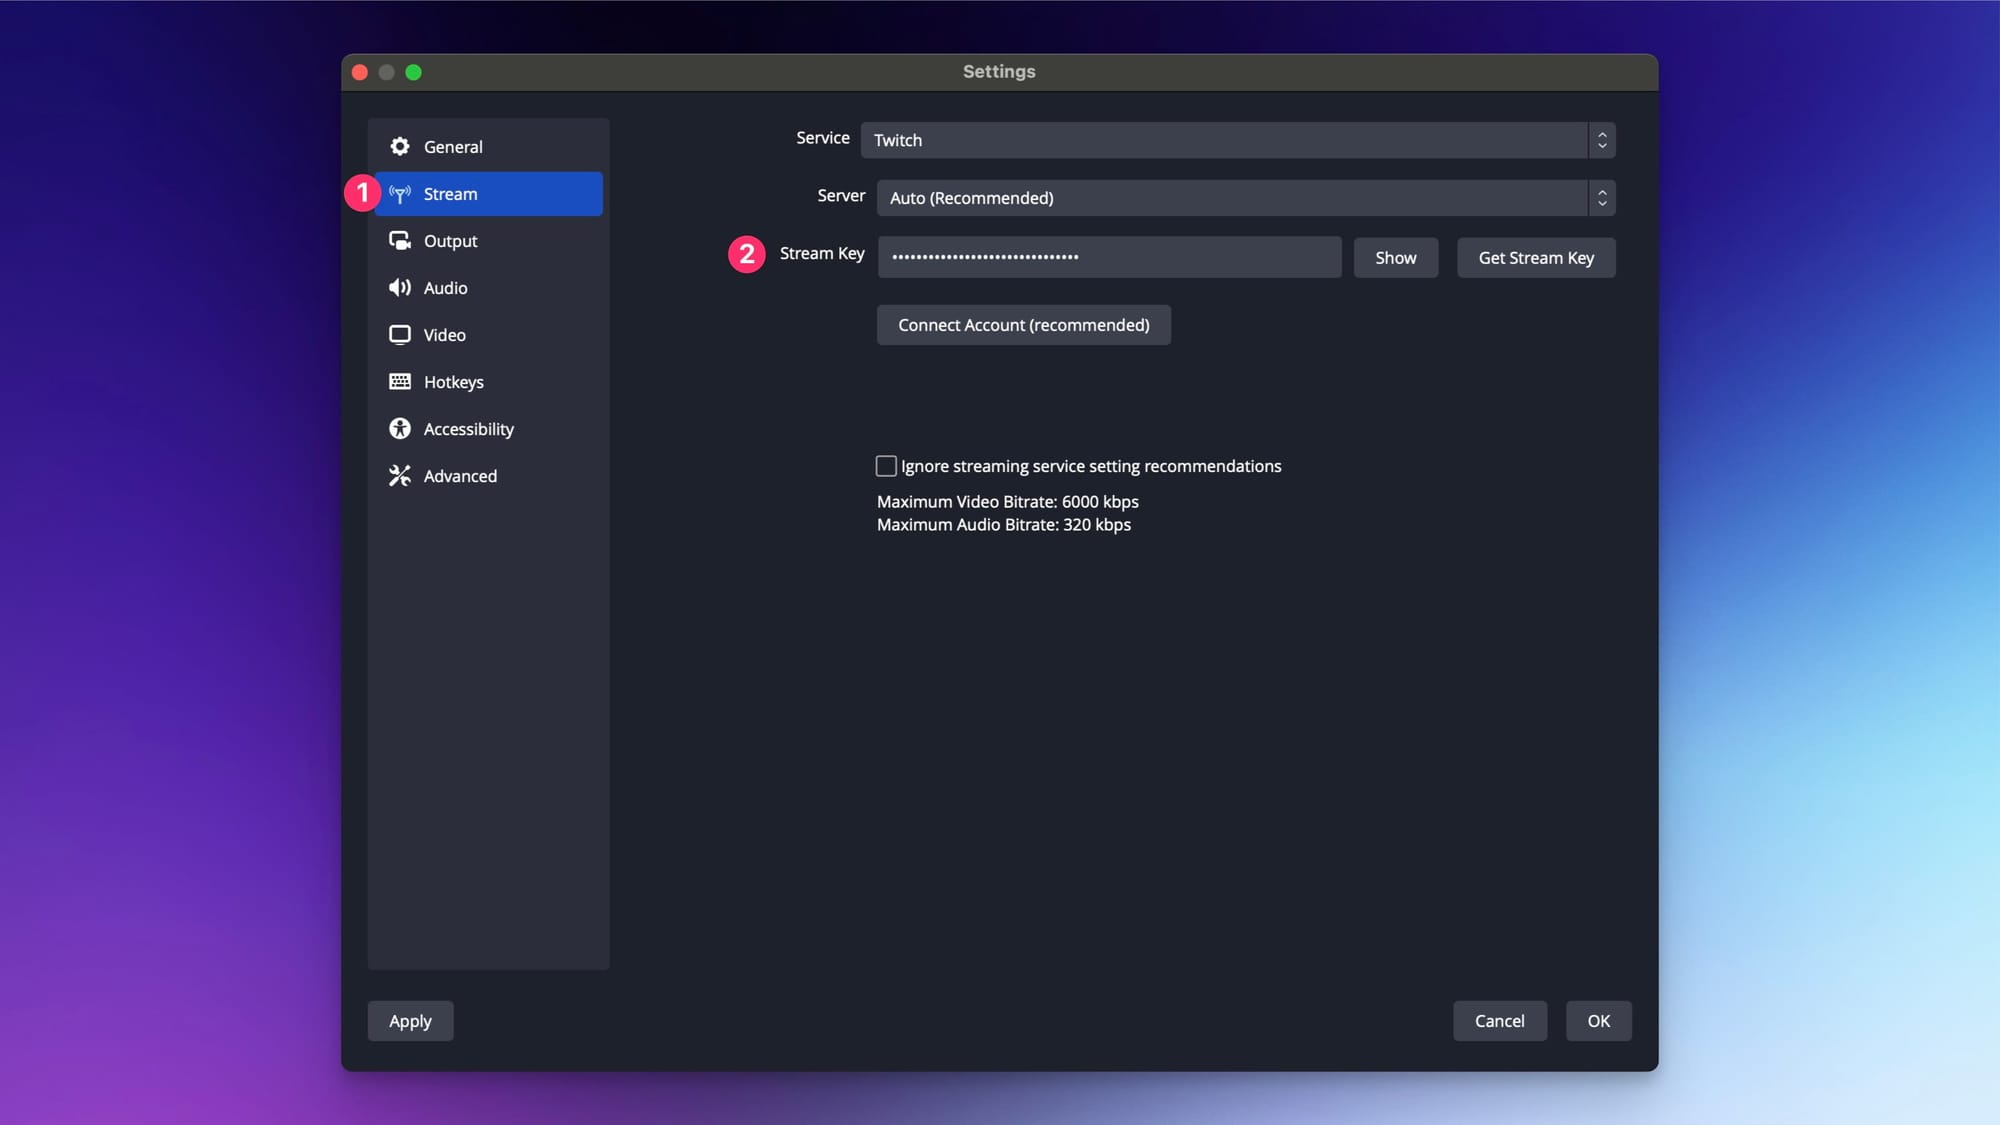
- Select Streaming, and from the drop-down list of services, select Twitch.
- You can leave the Server field on Auto or select the region manually. Keep in mind, the closer you are to the location geographically, the better your stream quality will be.
- In the Stream Key field, paste the Twitch stream key you copied earlier. You can now press Start Streaming in OBS Studio. The stream will be automatically broadcasted on Twitch.
You can also connect your account directly by logging into your Twitch account with your username and password. After you've logged in, OBS gets the streaming key automatically, and you are all set to live stream to Twitch.