
How to use a green screen with OBS
Chroma keying has become incredibly popular nowadays. People use it not just for gaming, but also in Zoom conferences, live interviews, talk shows, etc. Although it may feel complicated at first glance, setting up Chroma Key in OBS Studio is actually incredibly easy. Let’s look at the simple steps you need to take to set up a green screen in OBS.
- Make sure you have the following equipment prepared: a solid green background, webcam or video camera, lighting, and OBS Studio.
- Download the latest stable version of OBS Studio from the official website and install the software. Open OBS and let the Auto-Configuration Wizard optimize the software’s settings based on your hardware.
- Now you can add a video source.
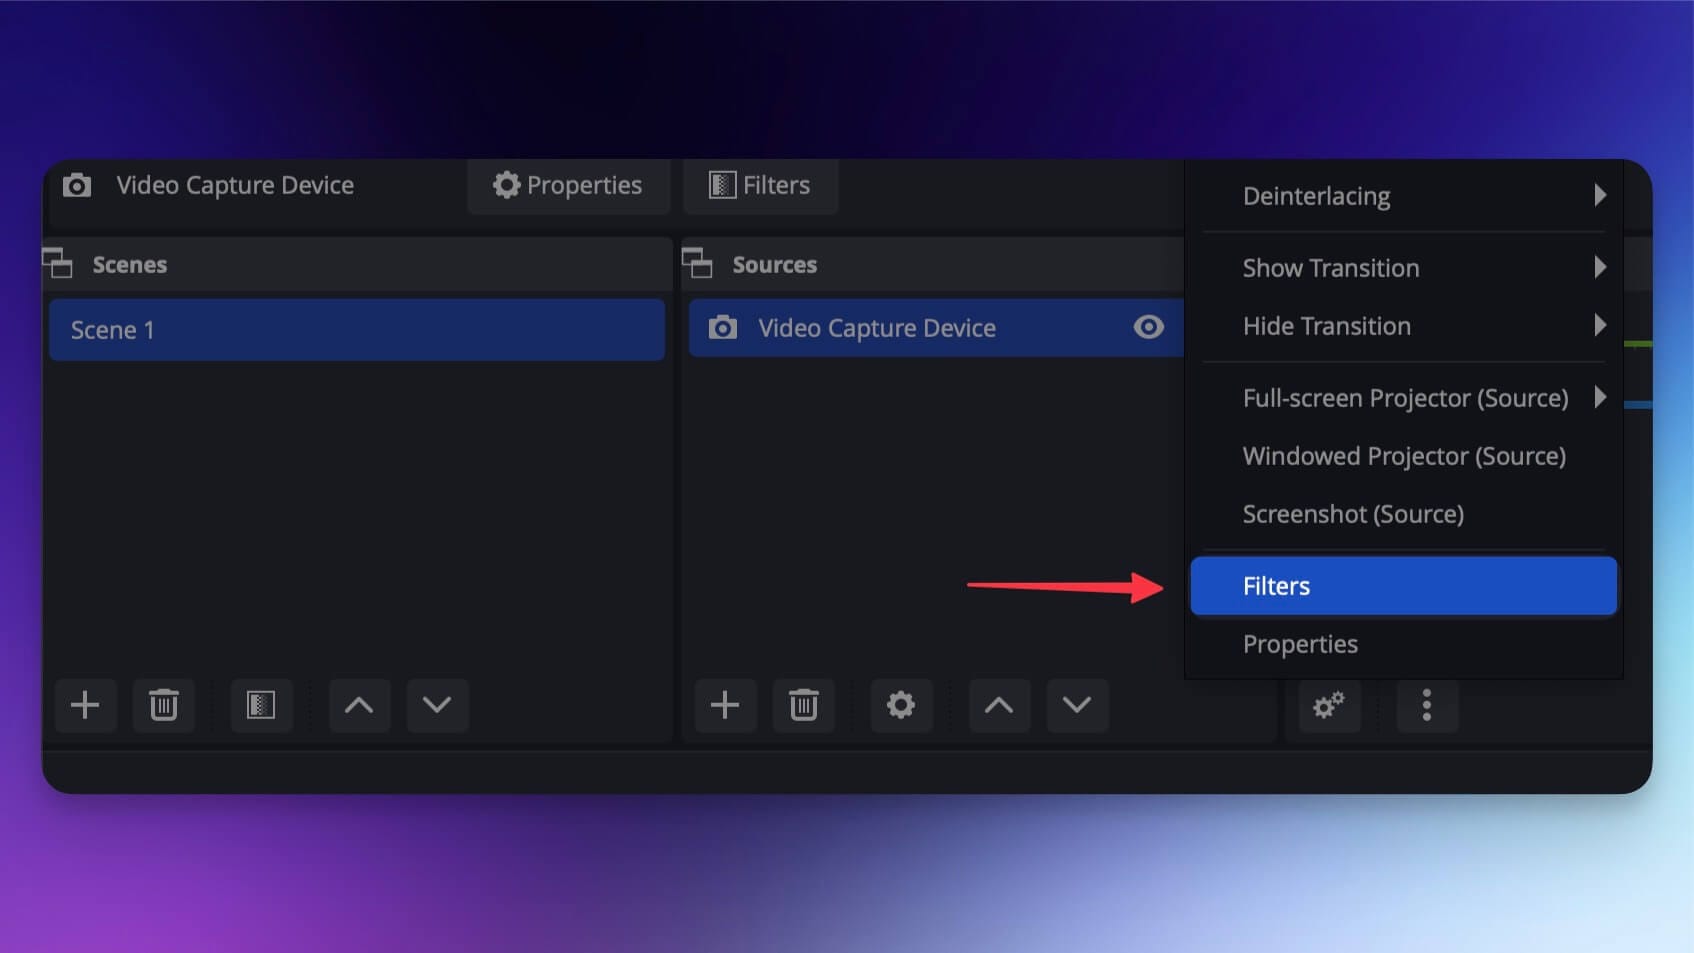
- Right-click on the video source you’ve created and select Filter.
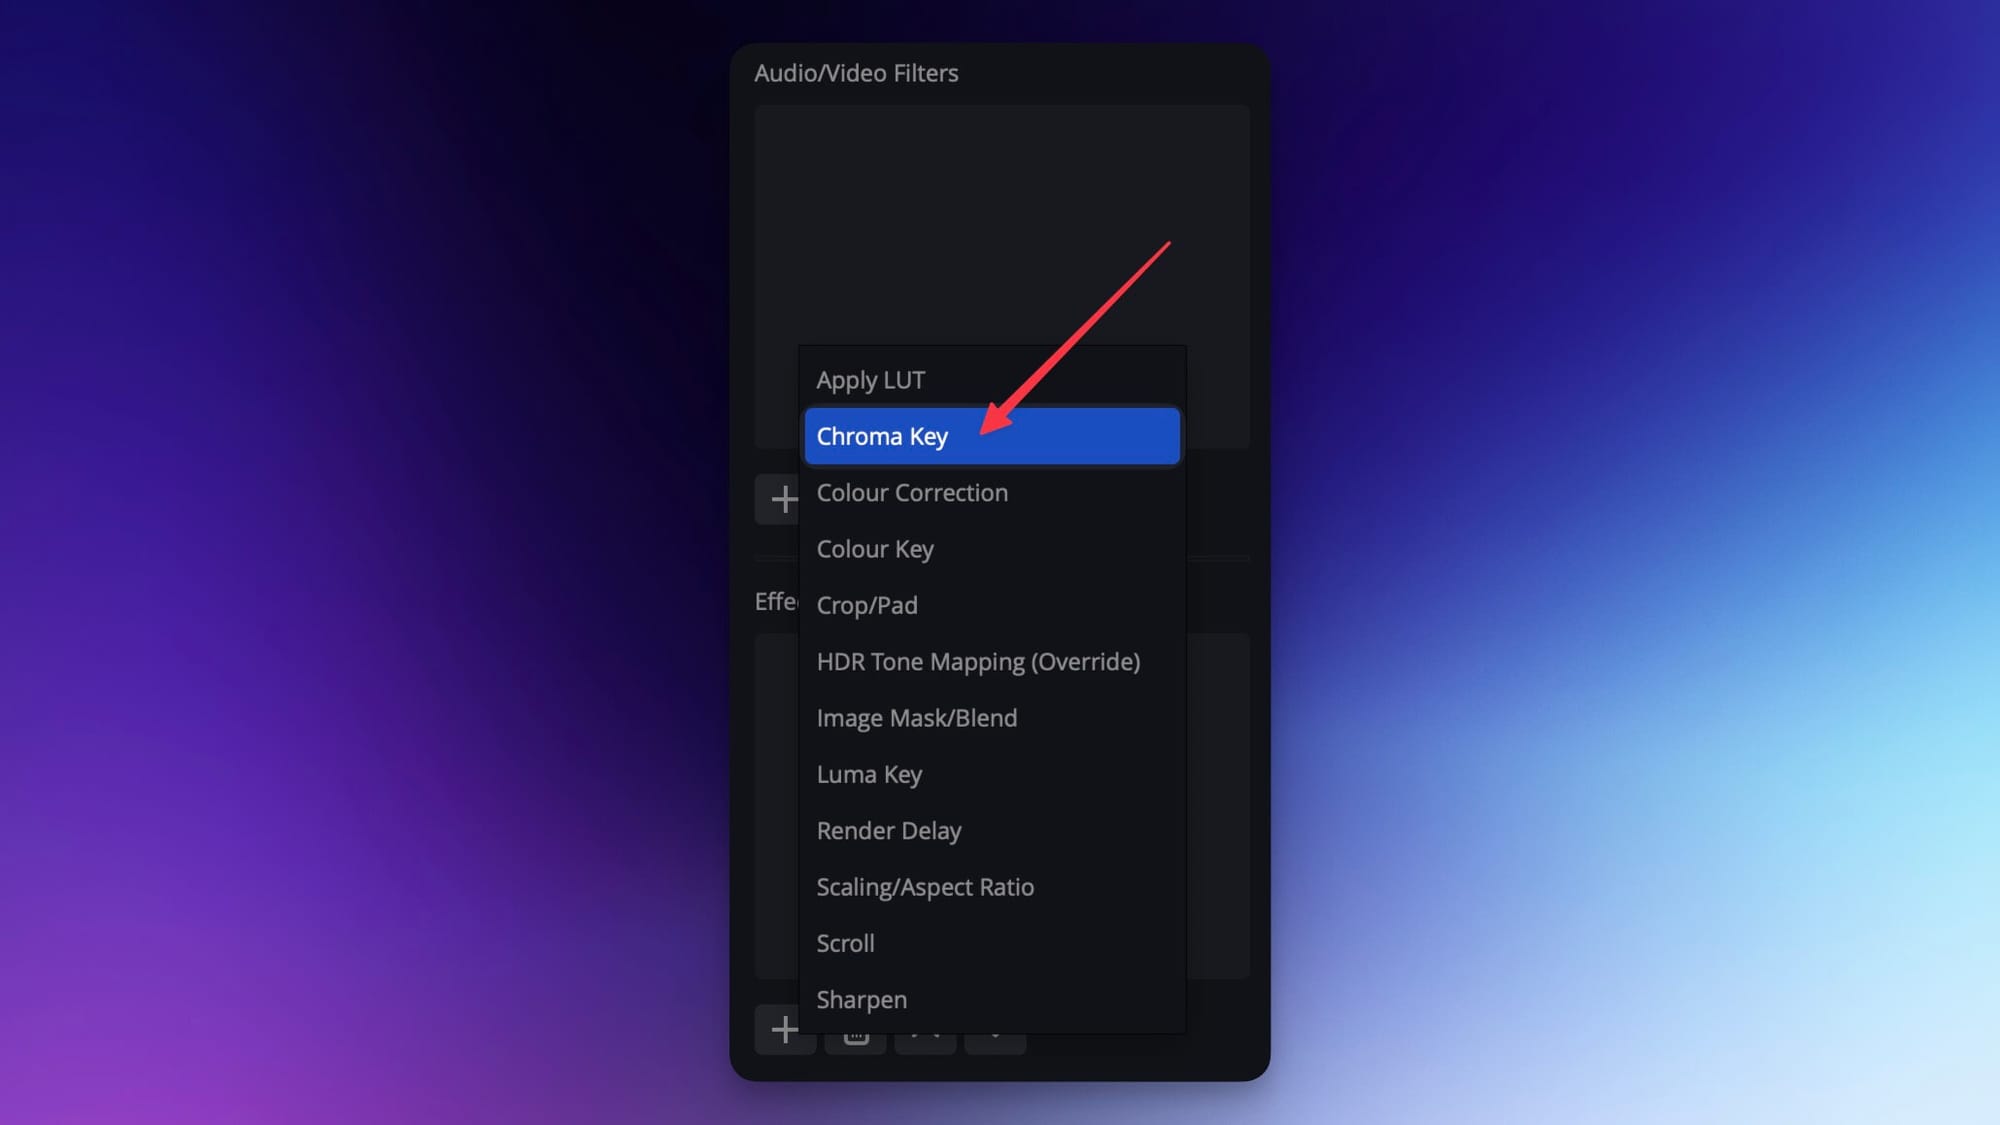
- Click the + button under the Effects Filters section and select Chroma Key.
- Type in a name for this effect layer.
- After you add a chroma key, OBS will automatically create and adjust the baseline settings for the filter. You can experiment with the sliders and settle when you are satisfied with the result.
- Make sure you aren’t wearing any green or reflective material. You can double-check the performance on the preview screen.
- If things are working smoothly, you are all set to start streaming with the green screen on.
Pro tip: with Restream Studio, you don't need a green screen to be able to replace your background. The virtual backgrounds feature automatically swaps your backdrop with an image of your choice—no additional equipment is needed!