
How to stream on YouTube with OBS
Setting up live streams on YouTube with OBS Studio is very easy and requires little to no time. Here’s how to do it:
1. First, you have to enable the live streaming feature for your YouTube account. Go to your YouTube Studio and click Go Live on the top right. Choose your YouTube live streaming settings and wait 24 hours for the activation period to end.
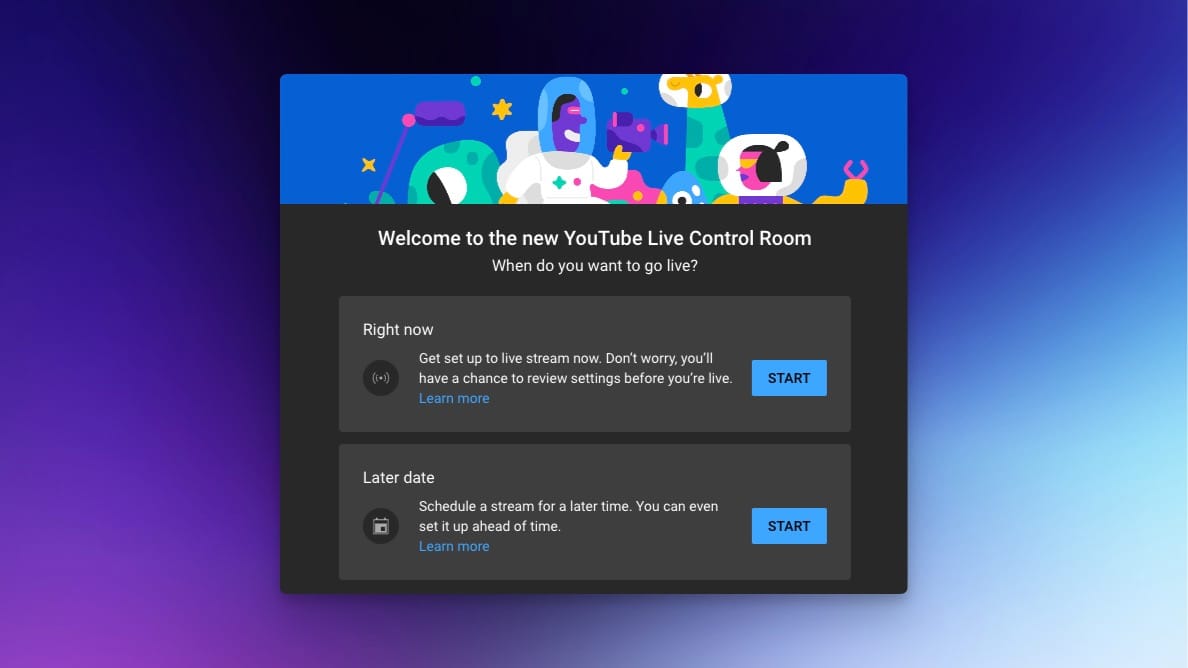
2. After you verify your account, you can get the stream key. Click Start next to the Right Now (or Later Date for scheduled stream), and make sure all the settings are correct. Don’t forget to create an engaging title and description for your live stream. Also, you should set the live video to Public.
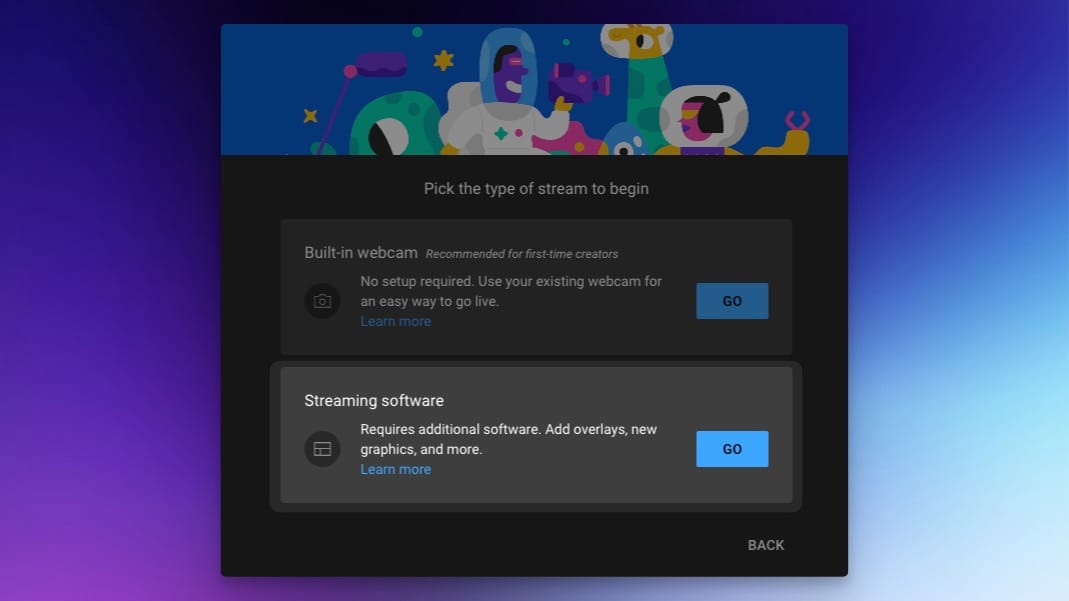
3. Click Go next to Streaming Software.
4. You’ll see a screen with settings for your stream. Under Stream Settings, you’ll see your stream key, which you can reset or copy.
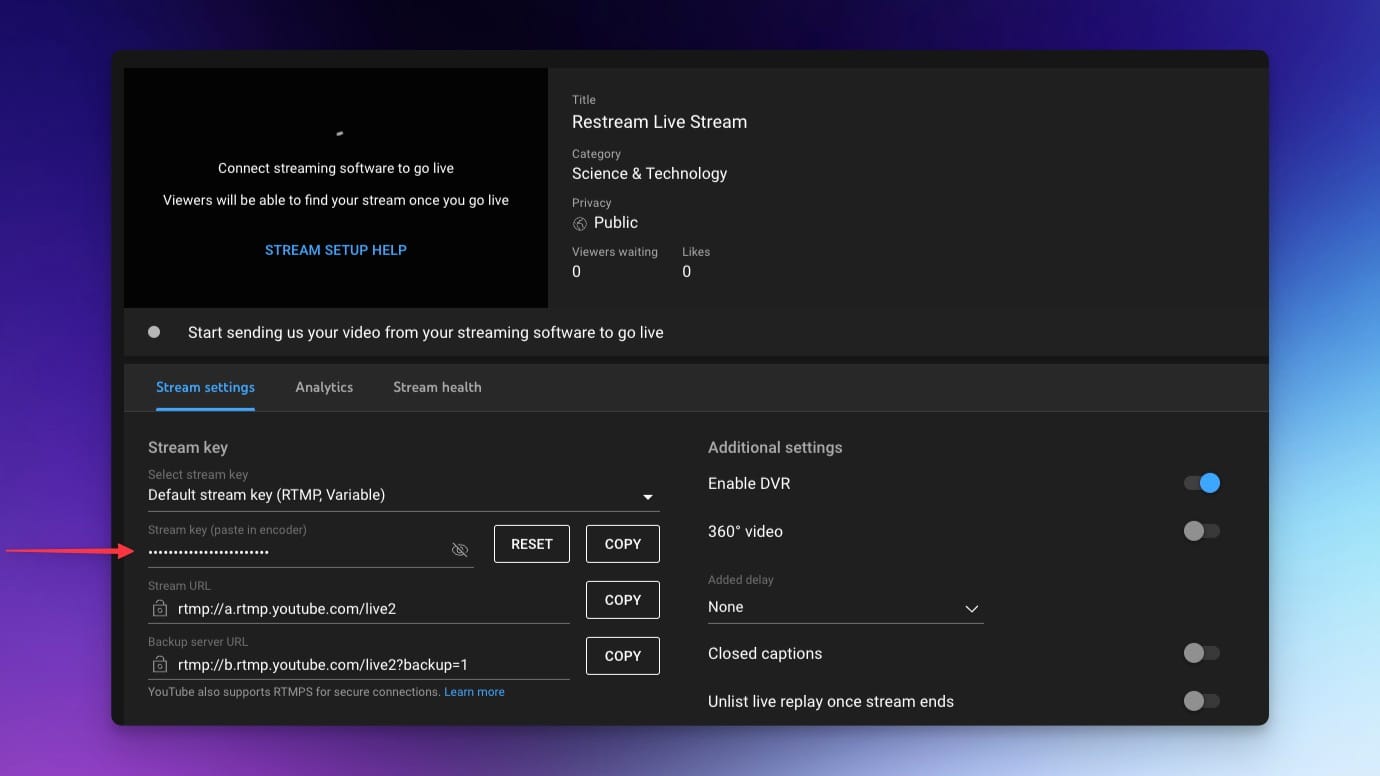
5. Copy your stream key to your clipboard so you can paste it into OBS later.
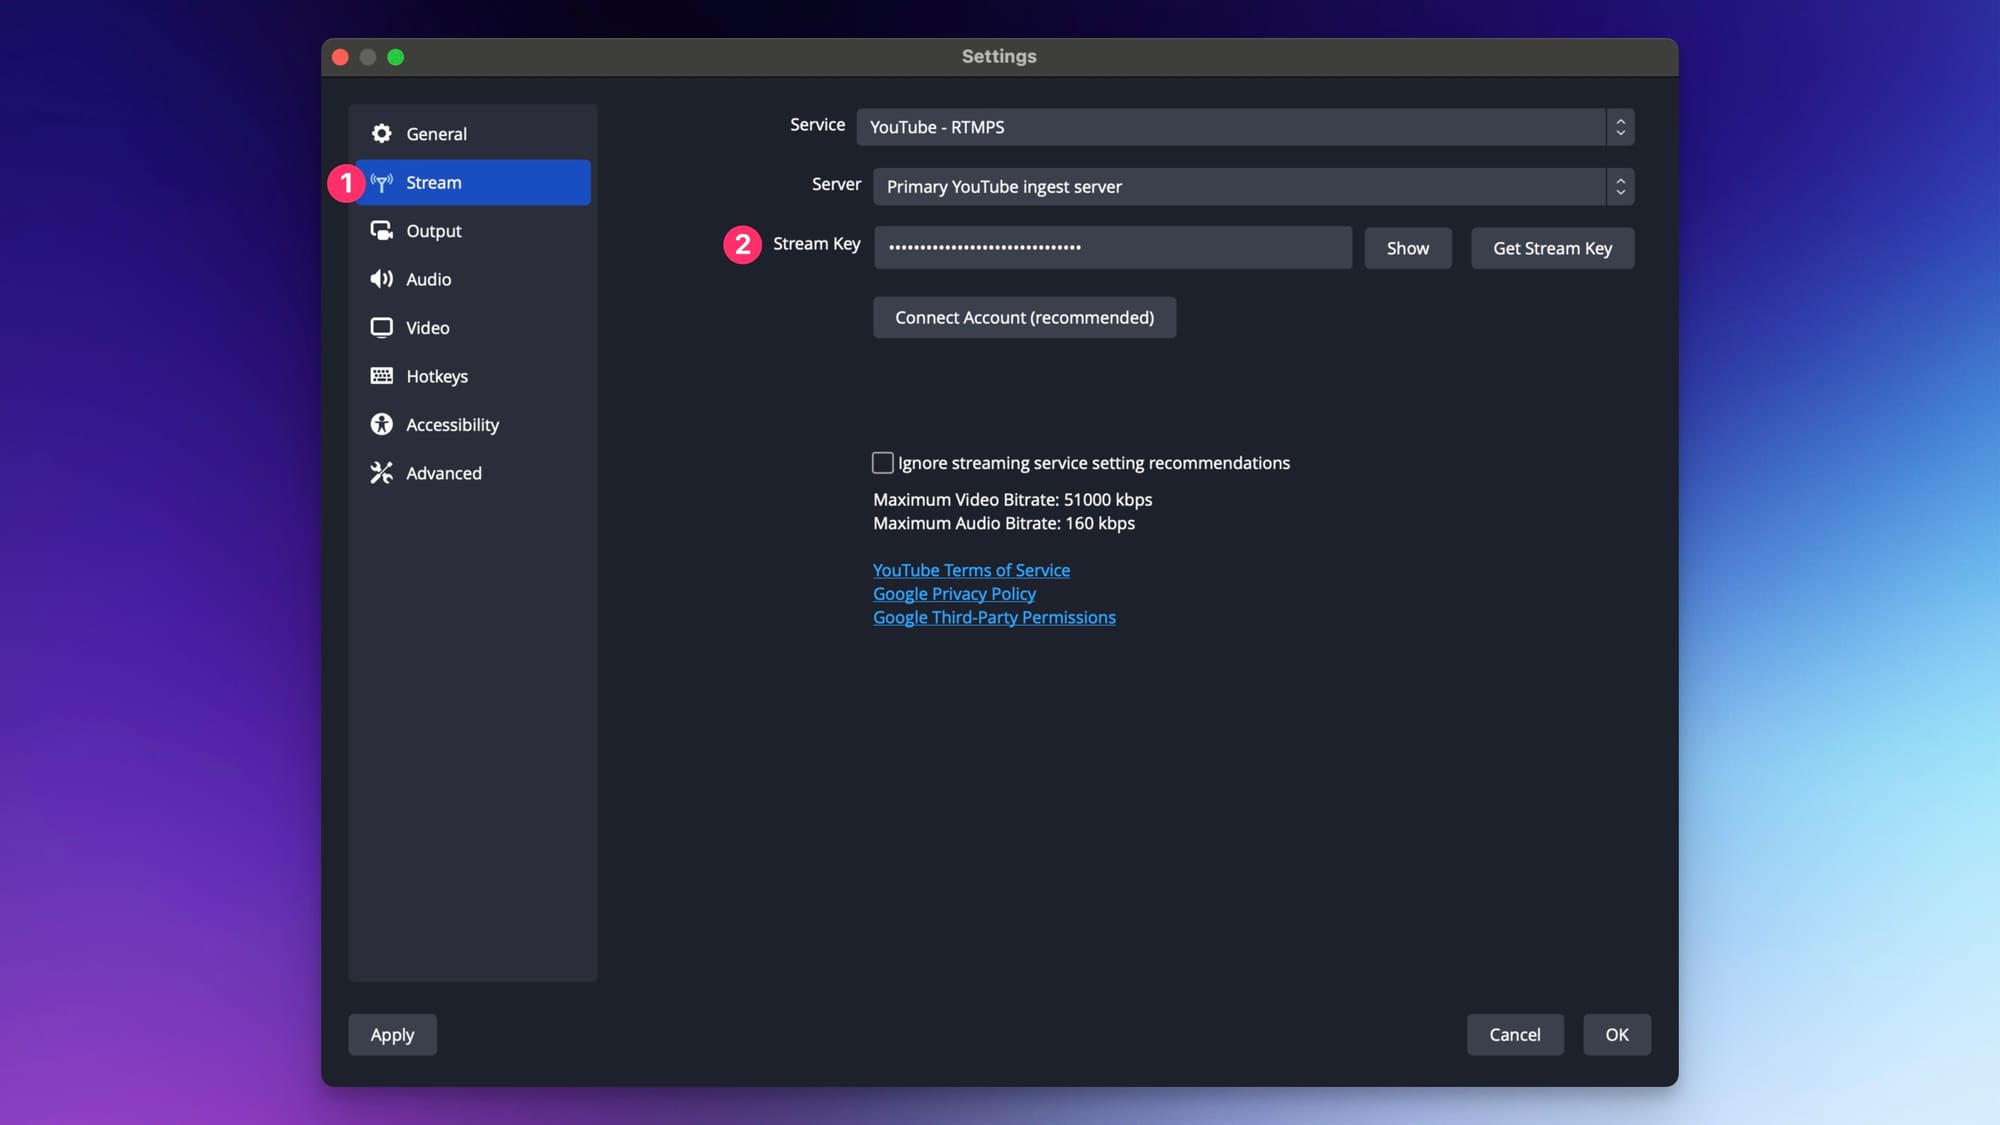
6. Open OBS and click Settings on the bottom right and click on the Stream tab. In the Service dropdown menu, select YouTube - RTMPS. Next select Use Stream Key.
7. Paste your YouTube stream key in the Stream Key field. Now OBS is linked with your YouTube account. Apply the settings and click “OK.” You can now click Start Streaming, and your broadcast will appear on YouTube Live. Please note: you may need to confirm your live status on YouTube after starting the broadcast to it if the auto-start feature is not enabled.
Your broadcast will now go live on YouTube as soon as you click Start Streaming in OBS. You will want to configure other settings in OBS as well, such as adding a camera and mic as sources. If you have a background or overlay, you can add those to your canvas in OBS as well.