Build on Restream API
We’ve relaunched the Restream Developer Portal with unified docs for the Events API, Chat API, Clips API, and Video Storage API.
Use OAuth 2.0 to integrate Restream into your apps. You can:
- Access channels, platforms, stream keys, and metadata via REST API
- Subscribe to real-time updates (stream status, chat events) over WebSockets
- Build custom dashboards and automate workflows
- Sync stream state with external systems
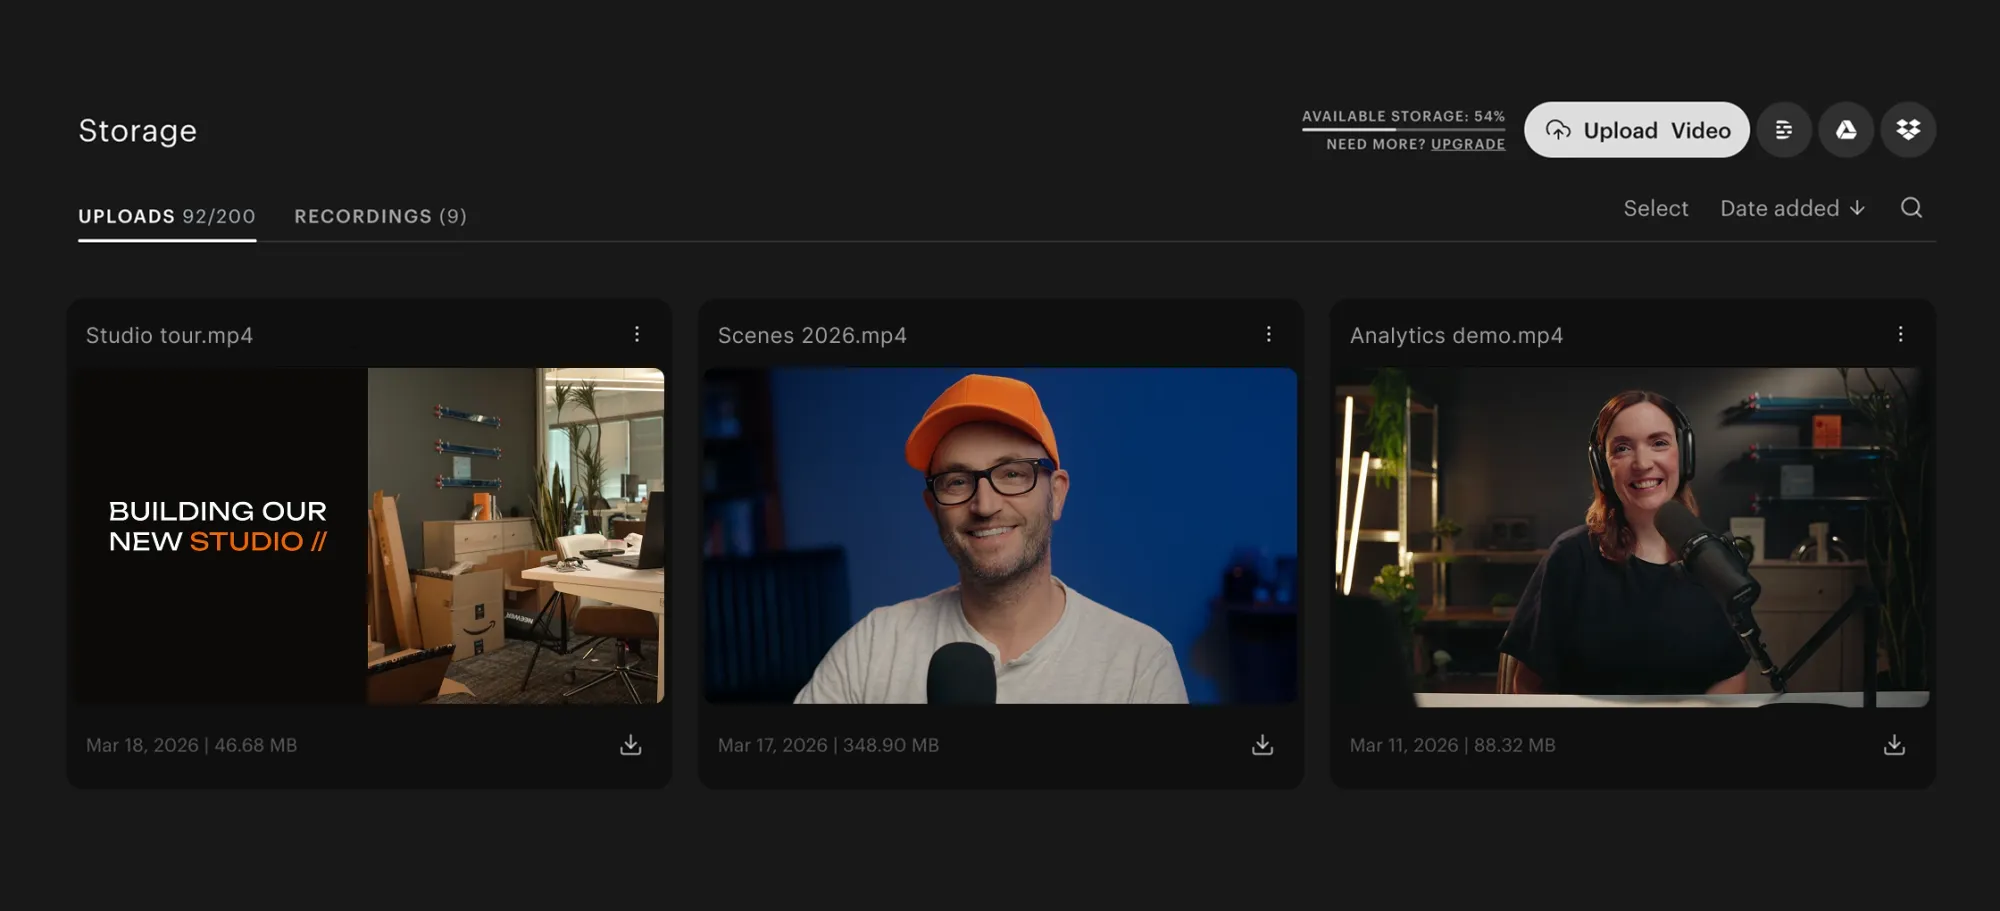
Your Video Storage, organized
Storage got a full refresh — manage your stream recordings and video uploads faster than ever.
- Sort your whole library
- Search by file name or label (like "dual" or "local recording")
- Watch videos in a new player on desktop and mobile
- Bulk delete or schedule multiple files at once
- See exactly where a video is used before deleting it
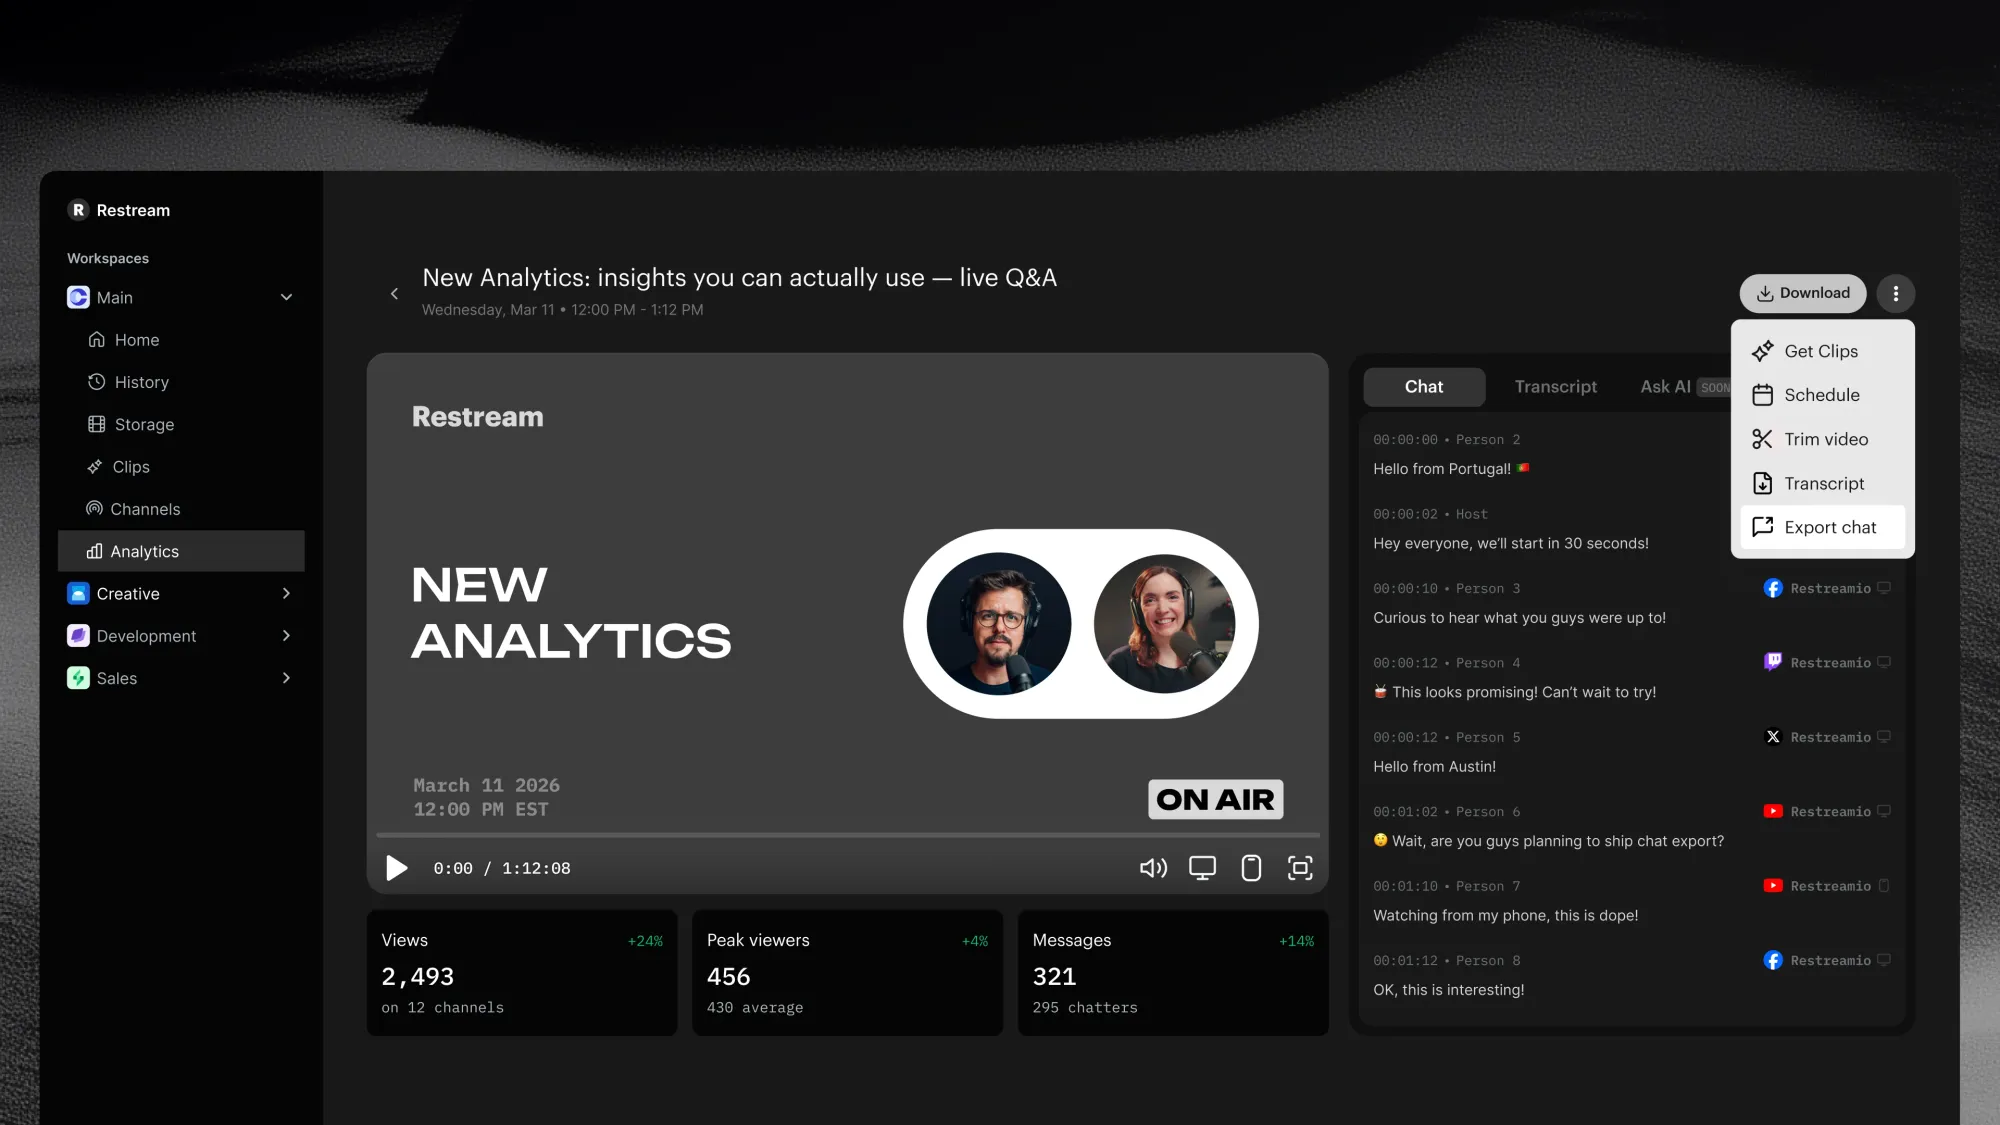
Read and export chat messages
Curious how your audience reacted during your live stream? Open any past stream analytics page to revisit the conversation anytime.
- Replay chat with your recording to see what viewers were saying during the stream.
- Export chat as CSV for deeper analysis.
- Structured, timestamped data from all supported chat platforms
- Anonymized chatter handles to protect viewer privacy
Restream Analytics: Understand your stream performance
Track how your streams perform across platforms in one place. Restream Analytics helps you understand audience growth, engagement, and performance with clear insights for every broadcast.
- Check analytics by date range – Filter performance over any time period and compare results between different ranges or your previous stream.
- Replay and learn — Watch your stream recording alongside chat activity and review the transcript to revisit key moments.
- Detailed stream analytics – Explore metrics for each stream, including views, chat activity, and stream quality.
- Cross-platform insights – See combined performance across all destinations you stream to.
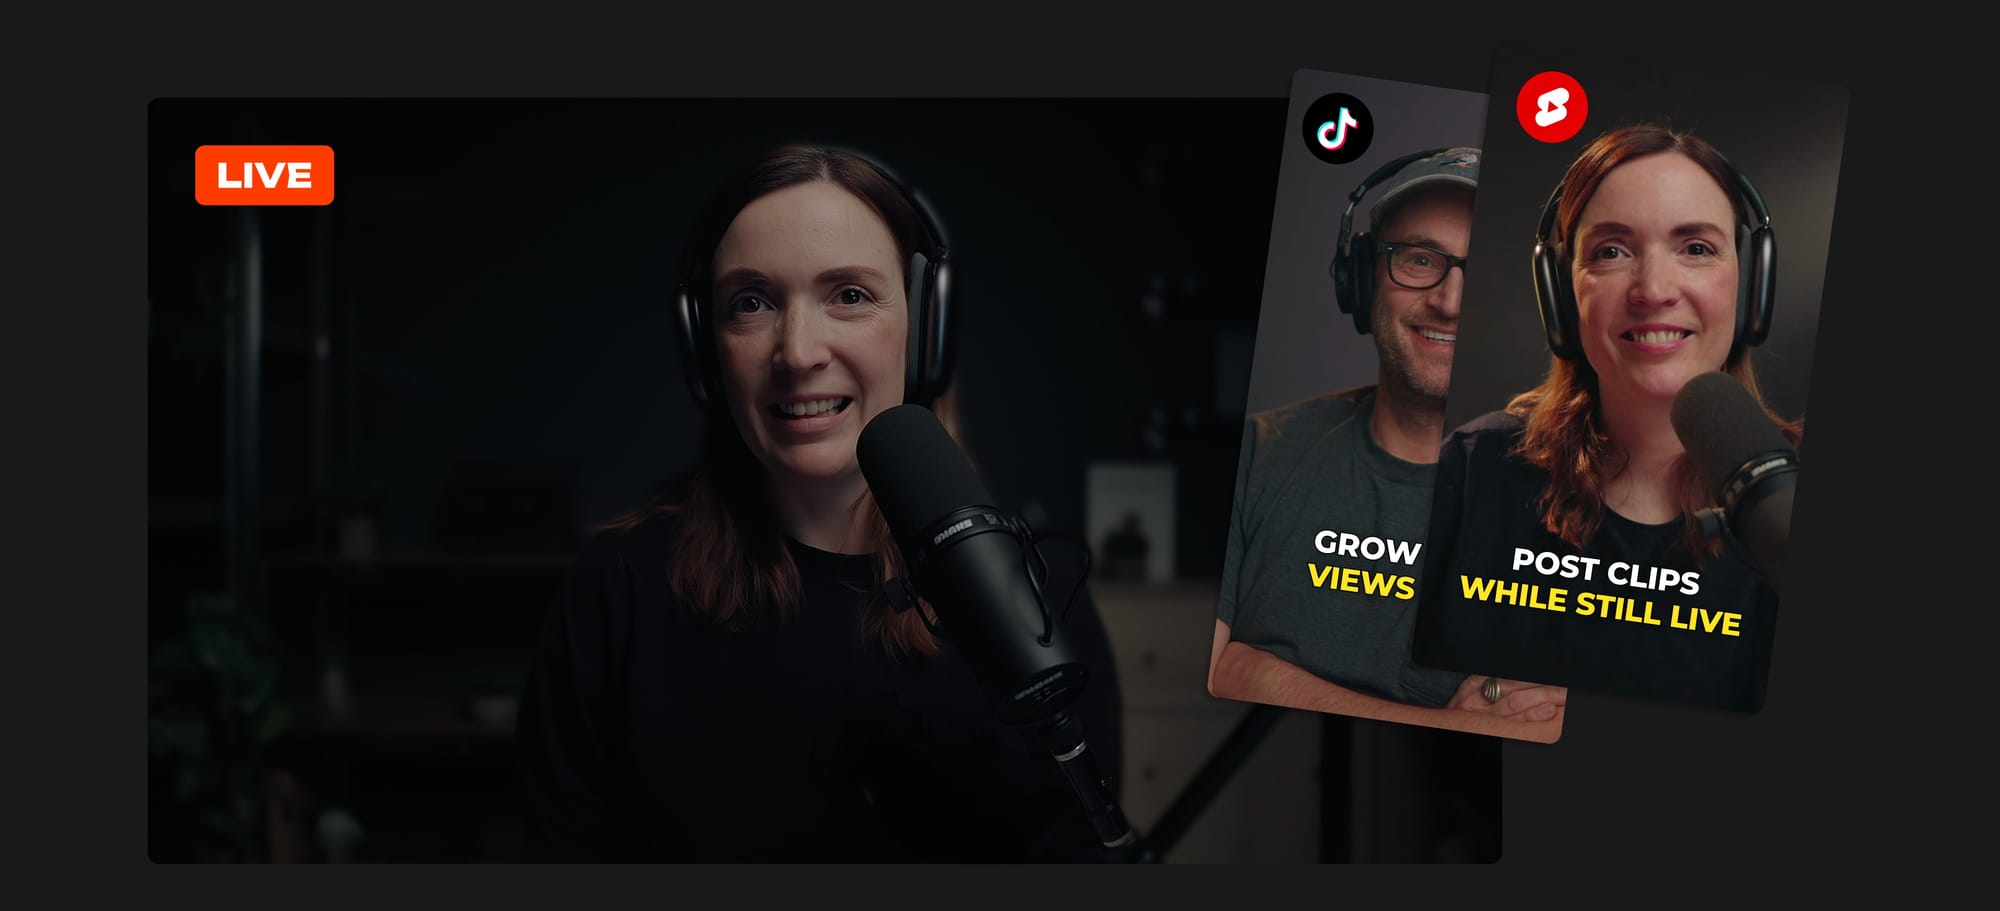
Get clips while you’re still live
Live Clipping generates short-form clips in real-time — so you can share highlights to social media while you're still on air. Clips appear progressively in your project, ready to download or share before your stream ends.
- To start, make sure you're on the 250 Clips plan.
- Enable Live Clipping in Clips settings
- Go live — clips start appearing within minutes. Learn more.
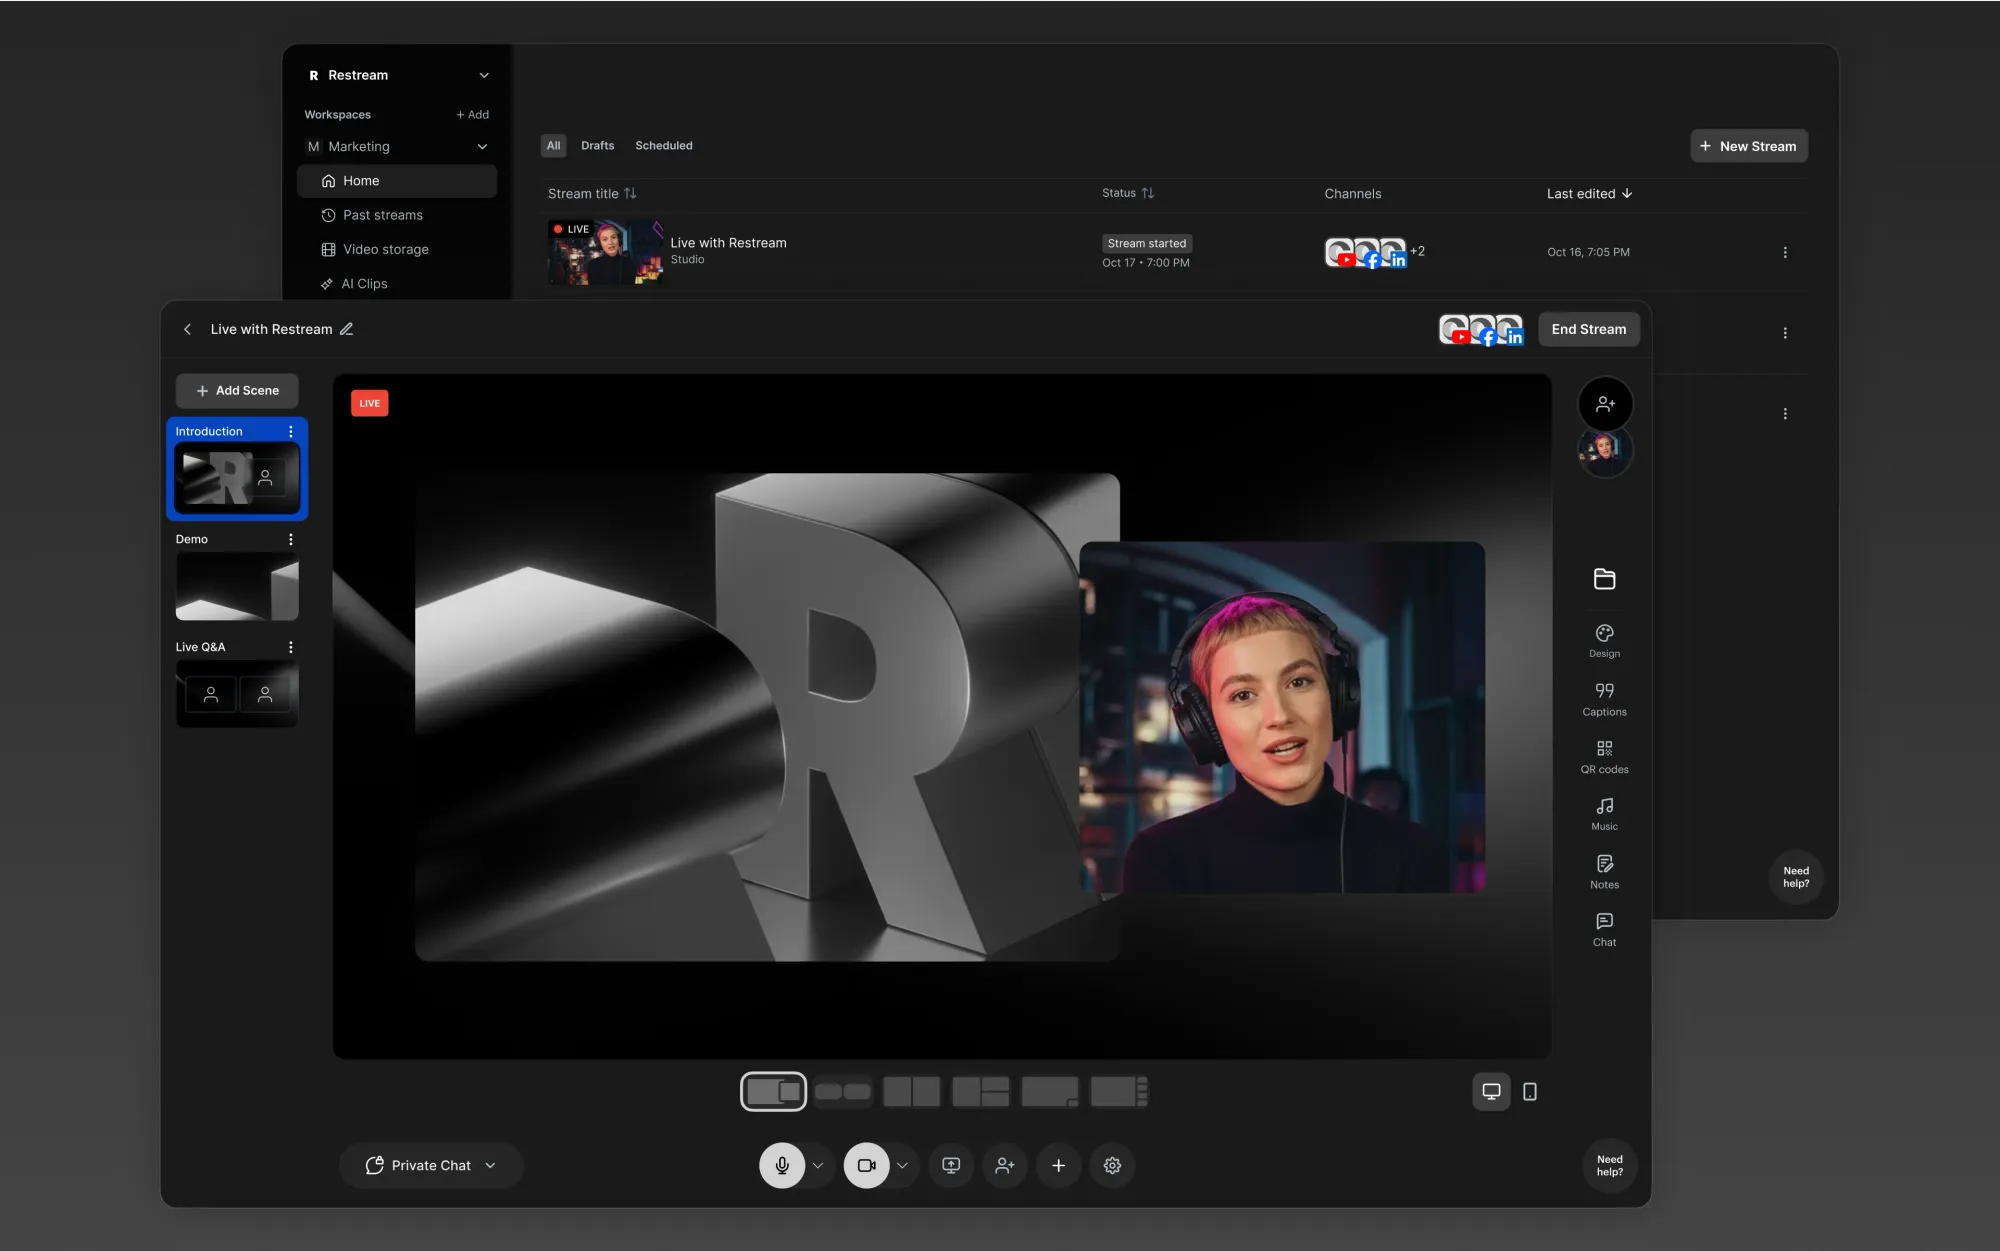
More informative Studio header
See all your live statuses in a redesigned Studio header, while keeping your stream view clean.
- Channels and event scheduling are now moved to the left side of the screen, closer to the stream title.
- No more canvas labels — resolution, stream timer, viewers count, and QR scans now live in the header center.
- New LIVE and RECORD indicators for faster status recognition.
- Clear cloud and local recording availability based on your plan.
- Unschedule events directly from the Schedule modal.
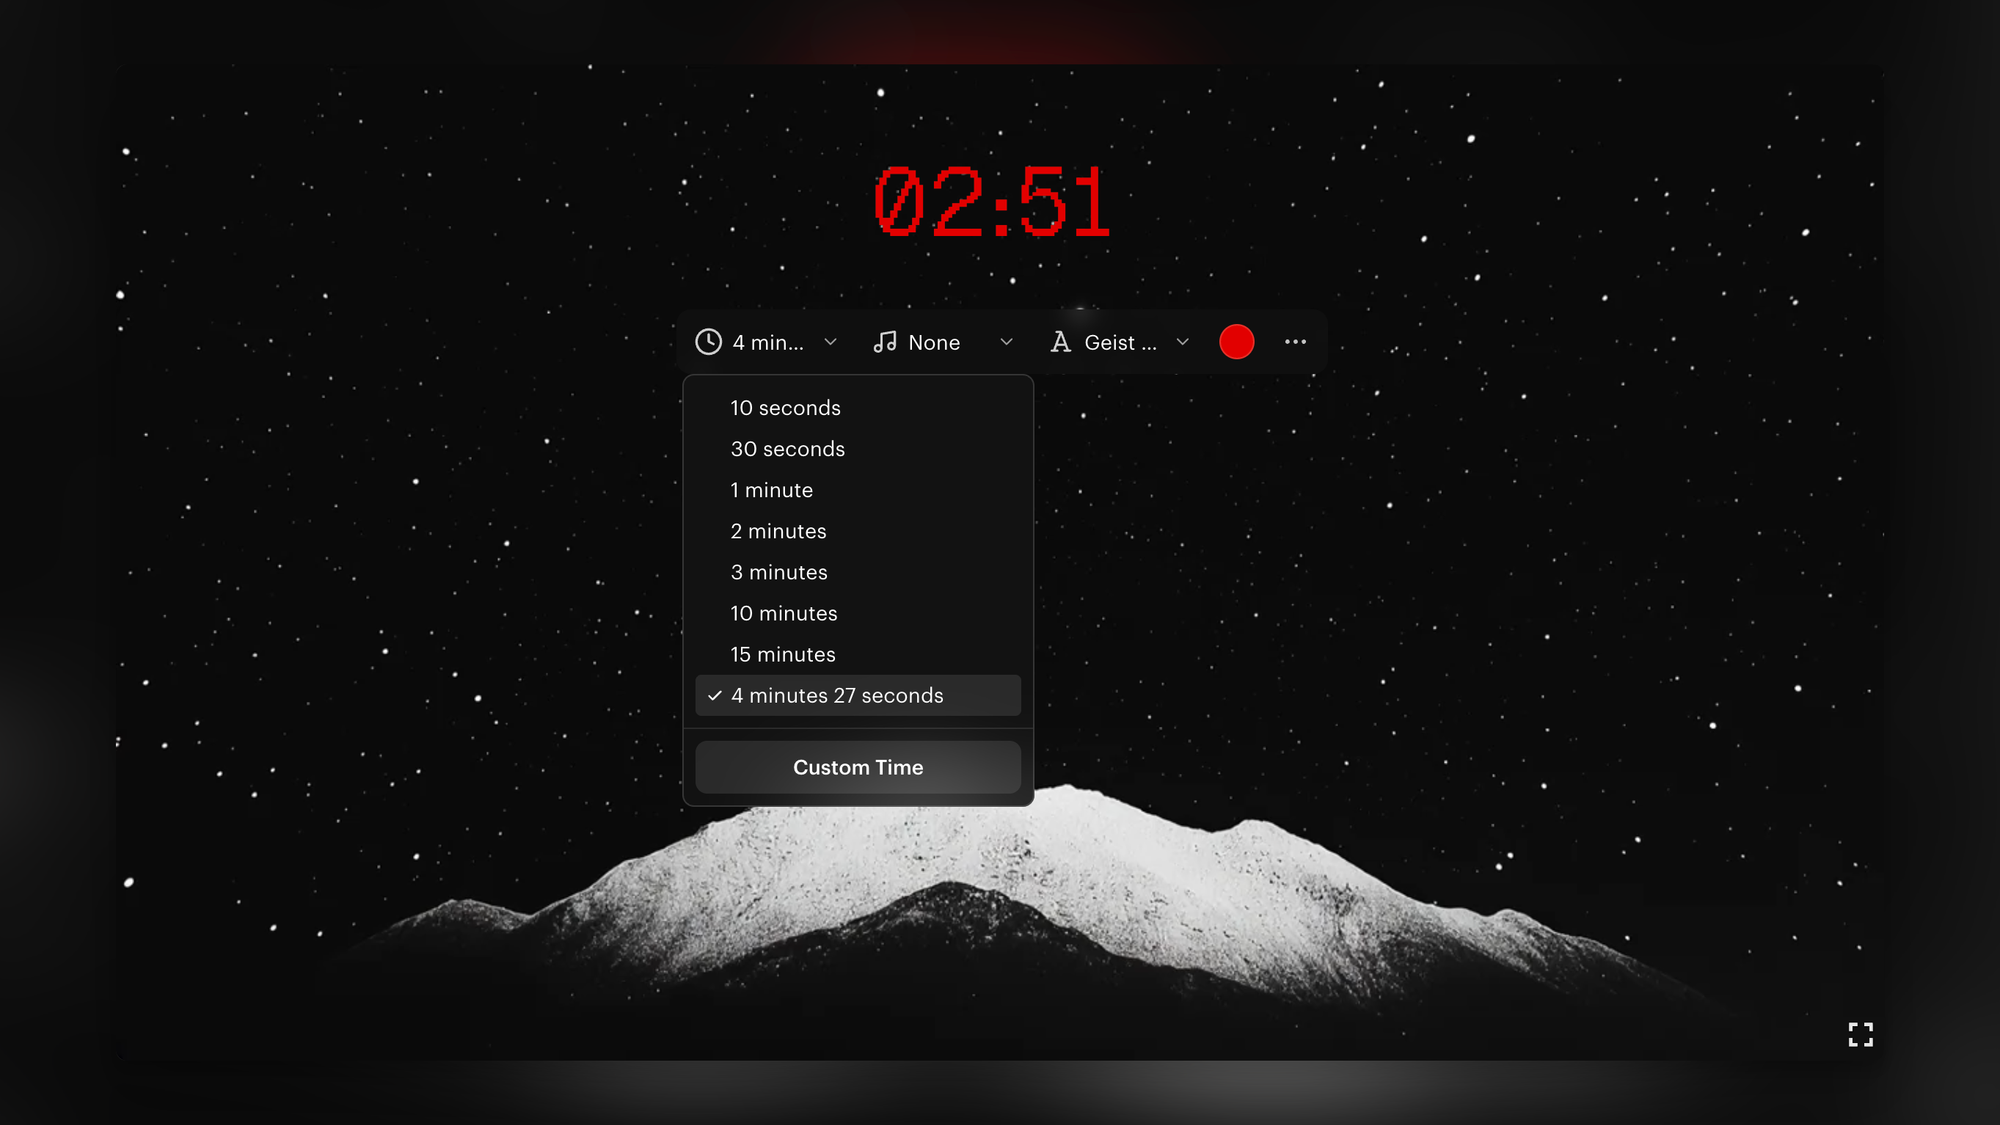
Custom duration for countdown timer
You can now set a custom duration (up to 1 hour) for your countdown timer.
Whether you’re matching the exact length of a song or syncing with a video background, you can adjust the timer to fit perfectly.
Your custom time is saved automatically for future use.
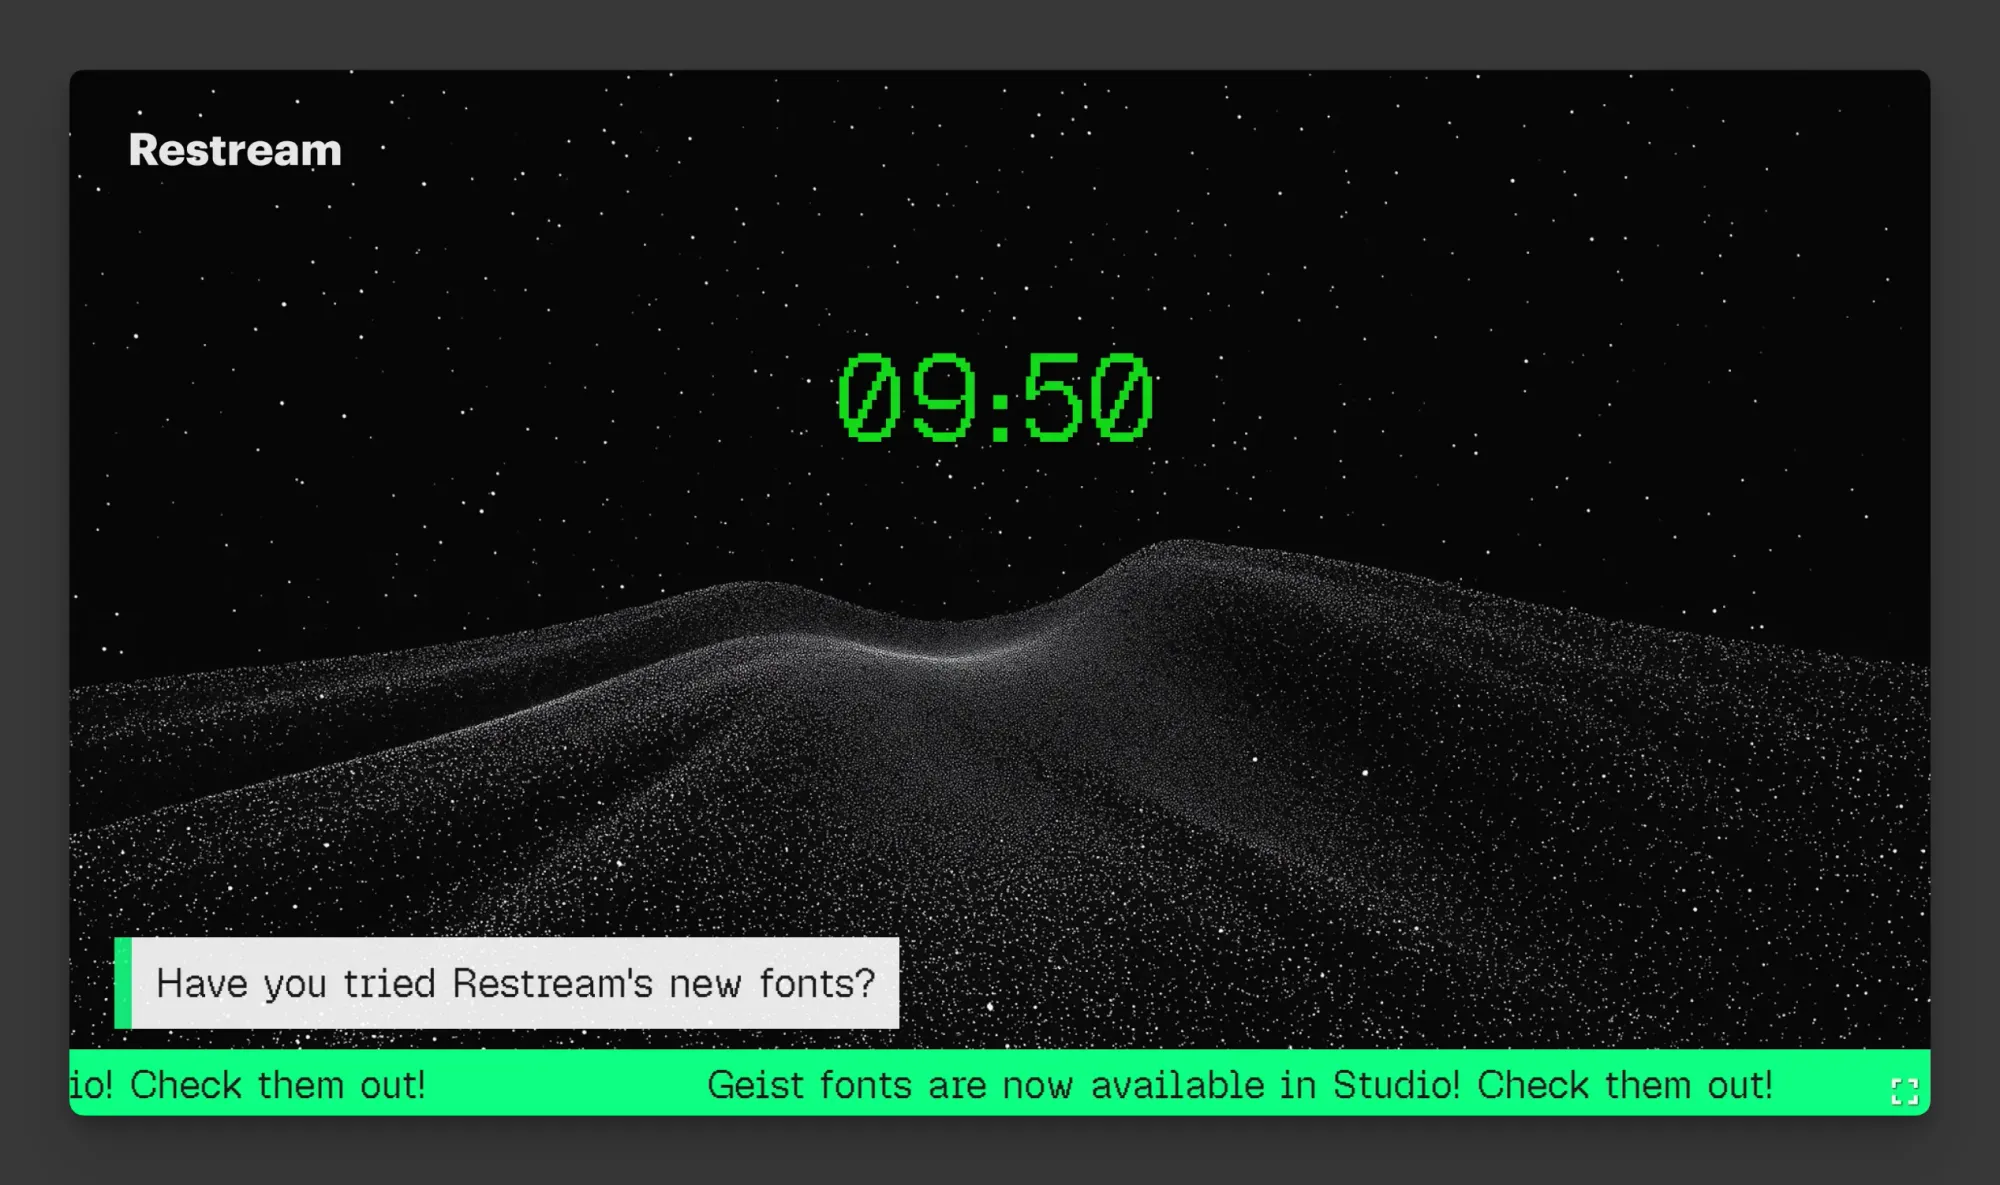
Geist fonts are now available in Studio
Try the new Geist font in your captions, tickers and countdown timer to create a clean and modern look for your broadcasts.
Geist fonts, developed by Vercel, reflect principles of simplicity, minimalism, and clarity, inspired by Swiss design. It’s optimized for readability and works well across different layouts and screen sizes. We added regular, mono, and pixel variants for you.
Stream in Landscape and Portrait at the same time in Studio
Go live in both horizontal and vertical from your browser. Cloud-powered — no extra load on your computer.
- Assign channels to Landscape (e.g., YouTube, LinkedIn) or Portrait (e.g., TikTok, Instagram).
- Stream to the same YouTube channel in both formats at once.
- Layouts with guests auto-adjust for each orientation.
- Preview both formats live on your Studio canvas.
Why it matters
Show up in vertical feeds and give every viewer the best experience for their screen.
Customize chat overlay
Now you have control over how your chat looks and where it lives on your stream:
- Move and resize freely.
- Style your chat using the toolbar, or open advanced settings from the 3-dot menu.
Chat settings are saved per scene, so each scene can have its own style and position. Your layout saves automatically.
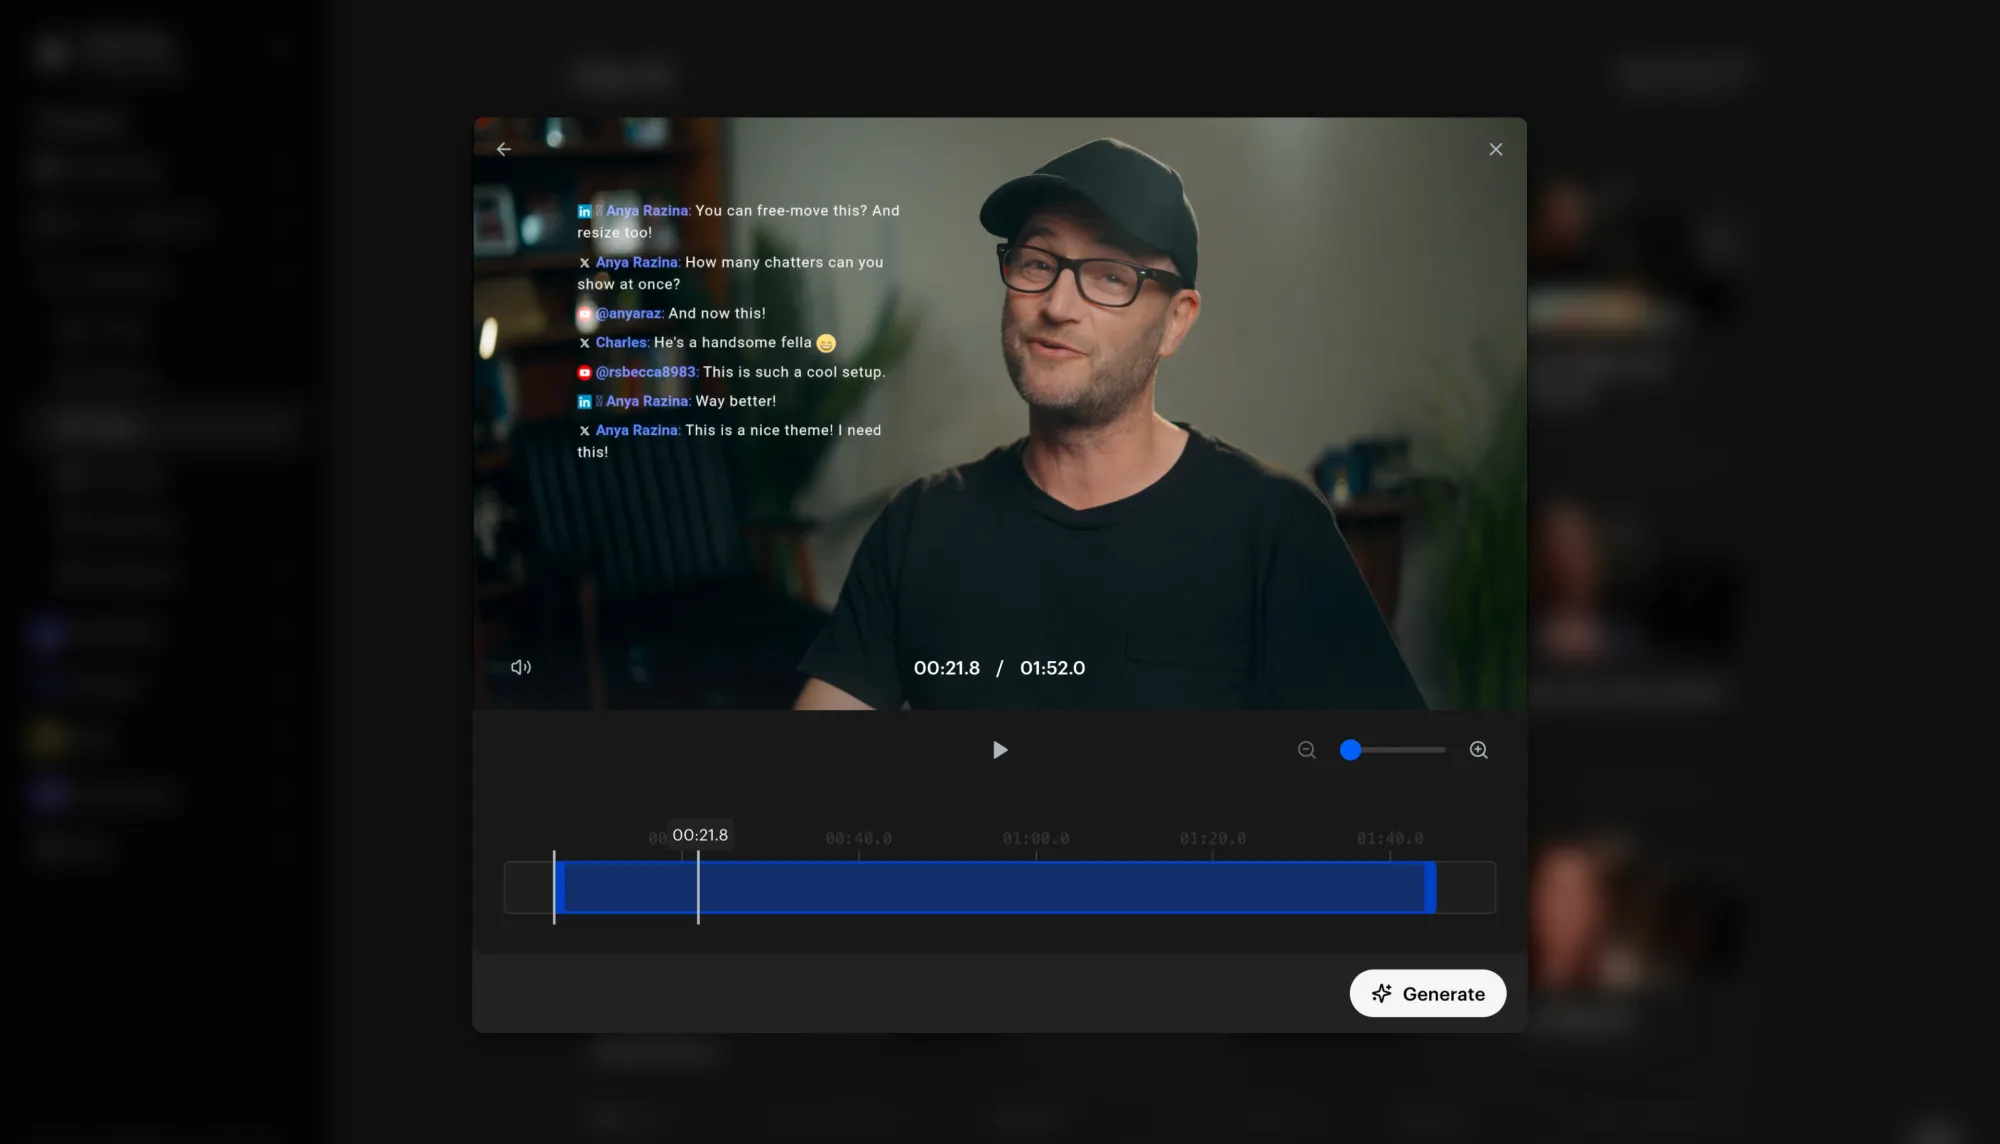
Generate clips from the parts that matter
When creating a new project, you'll now see a range selector — drag to choose the segment you want clipped, or keep the full video selected and generate as usual.
Clips public API
Build on top of Restream Clips with new additions to our Public API. Access your projects, clips, and downloads programmatically — perfect for custom workflows, integrations, and automation.
Check out our API docs to get started.
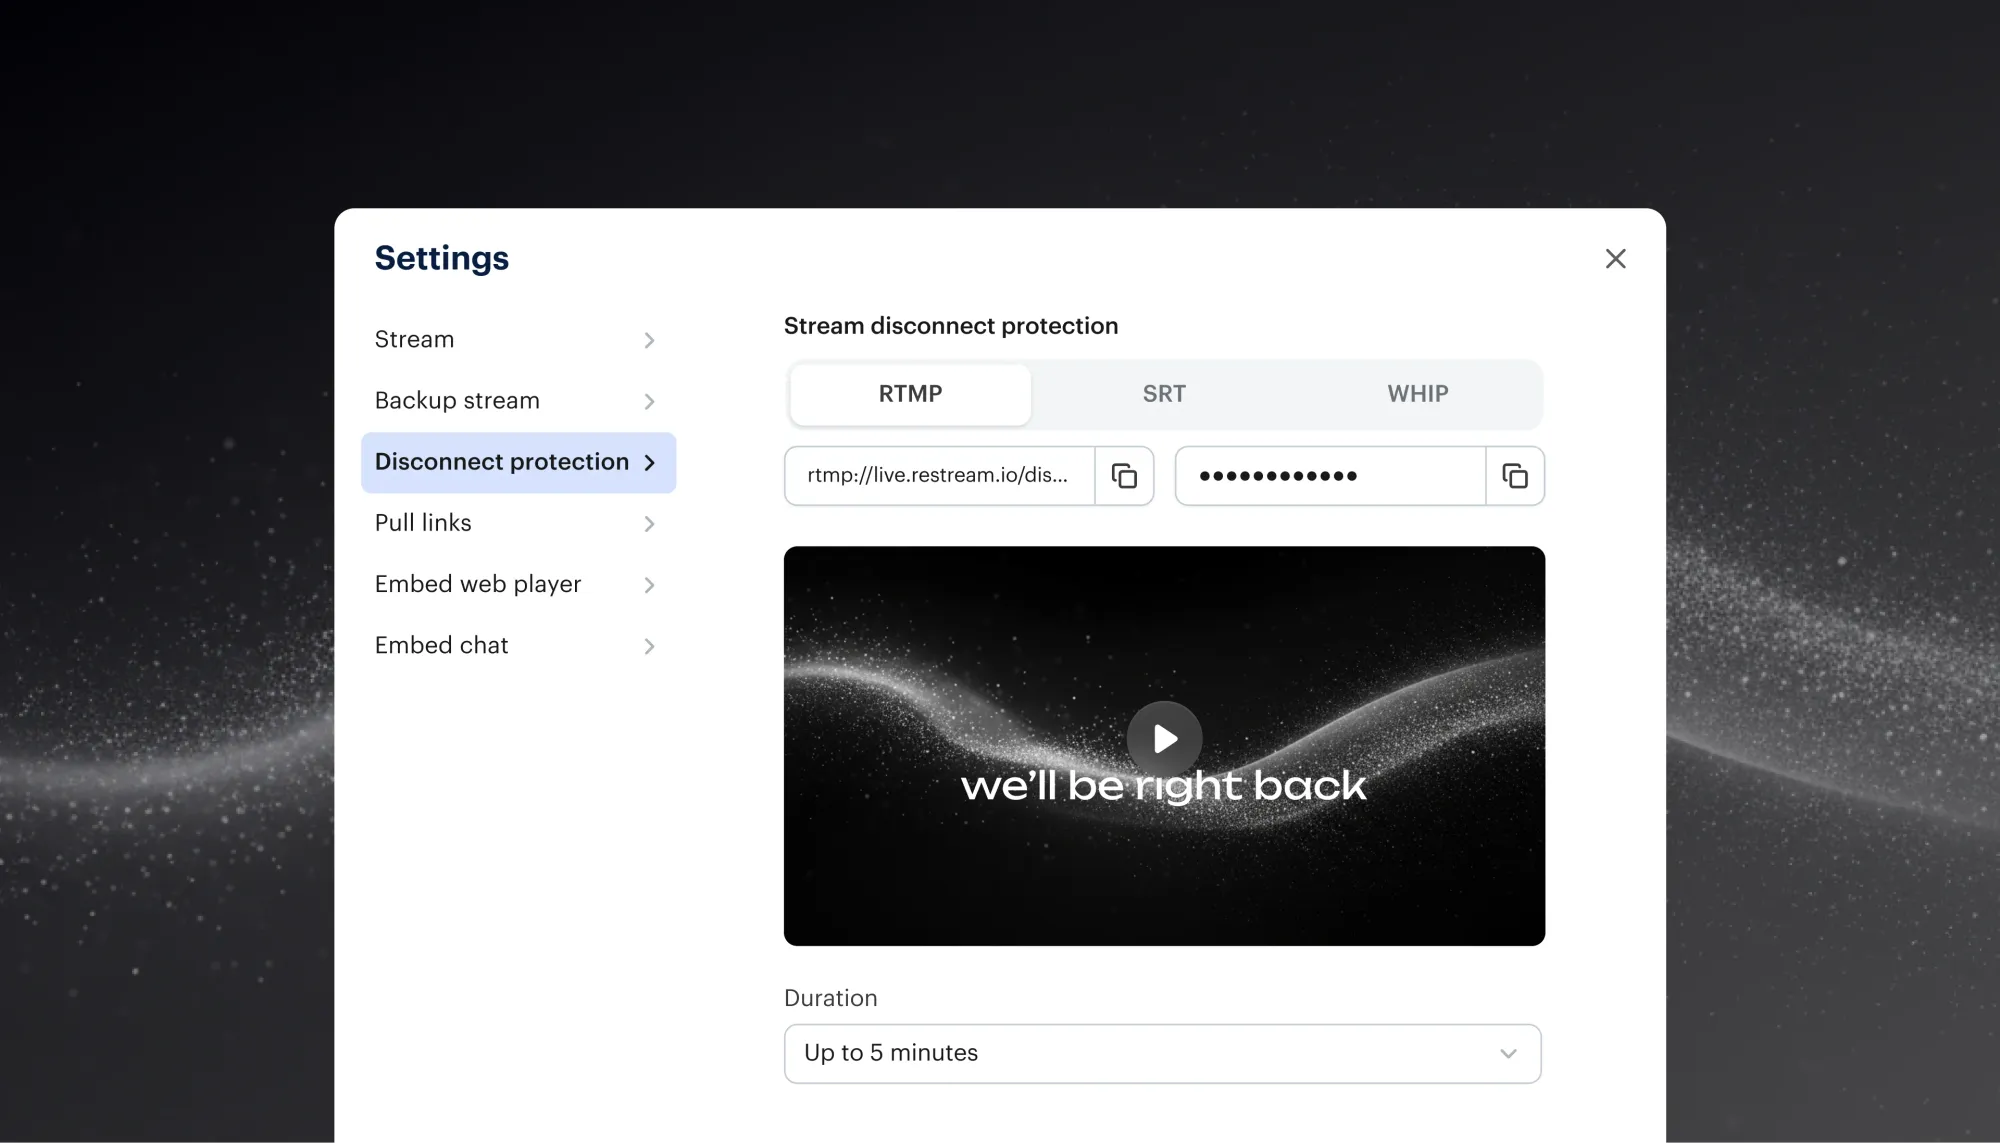
Protect important events from disconnects
Streaming via RTMP, SRT, or WHIP? Our video protection automatically plays if your stream drops, keeping your event live and your audience engaged until you’re back.
Want to customize the video or use it as an additional fallback alongside RTMP or SRT backup streams? Contact Sales.
Zoom and scroll while screen sharing in Studio
Restream Studio now supports scrolling and zooming while screen sharing browser tabs in Chromium-based browsers (👋 Chrome, Arc, Edge, Brave, etc.). Perfect for demos, walkthroughs, and presentations where you need to focus on details while screen sharing.
After granting browser permission, share a tab and zoom or scroll directly in Studio.
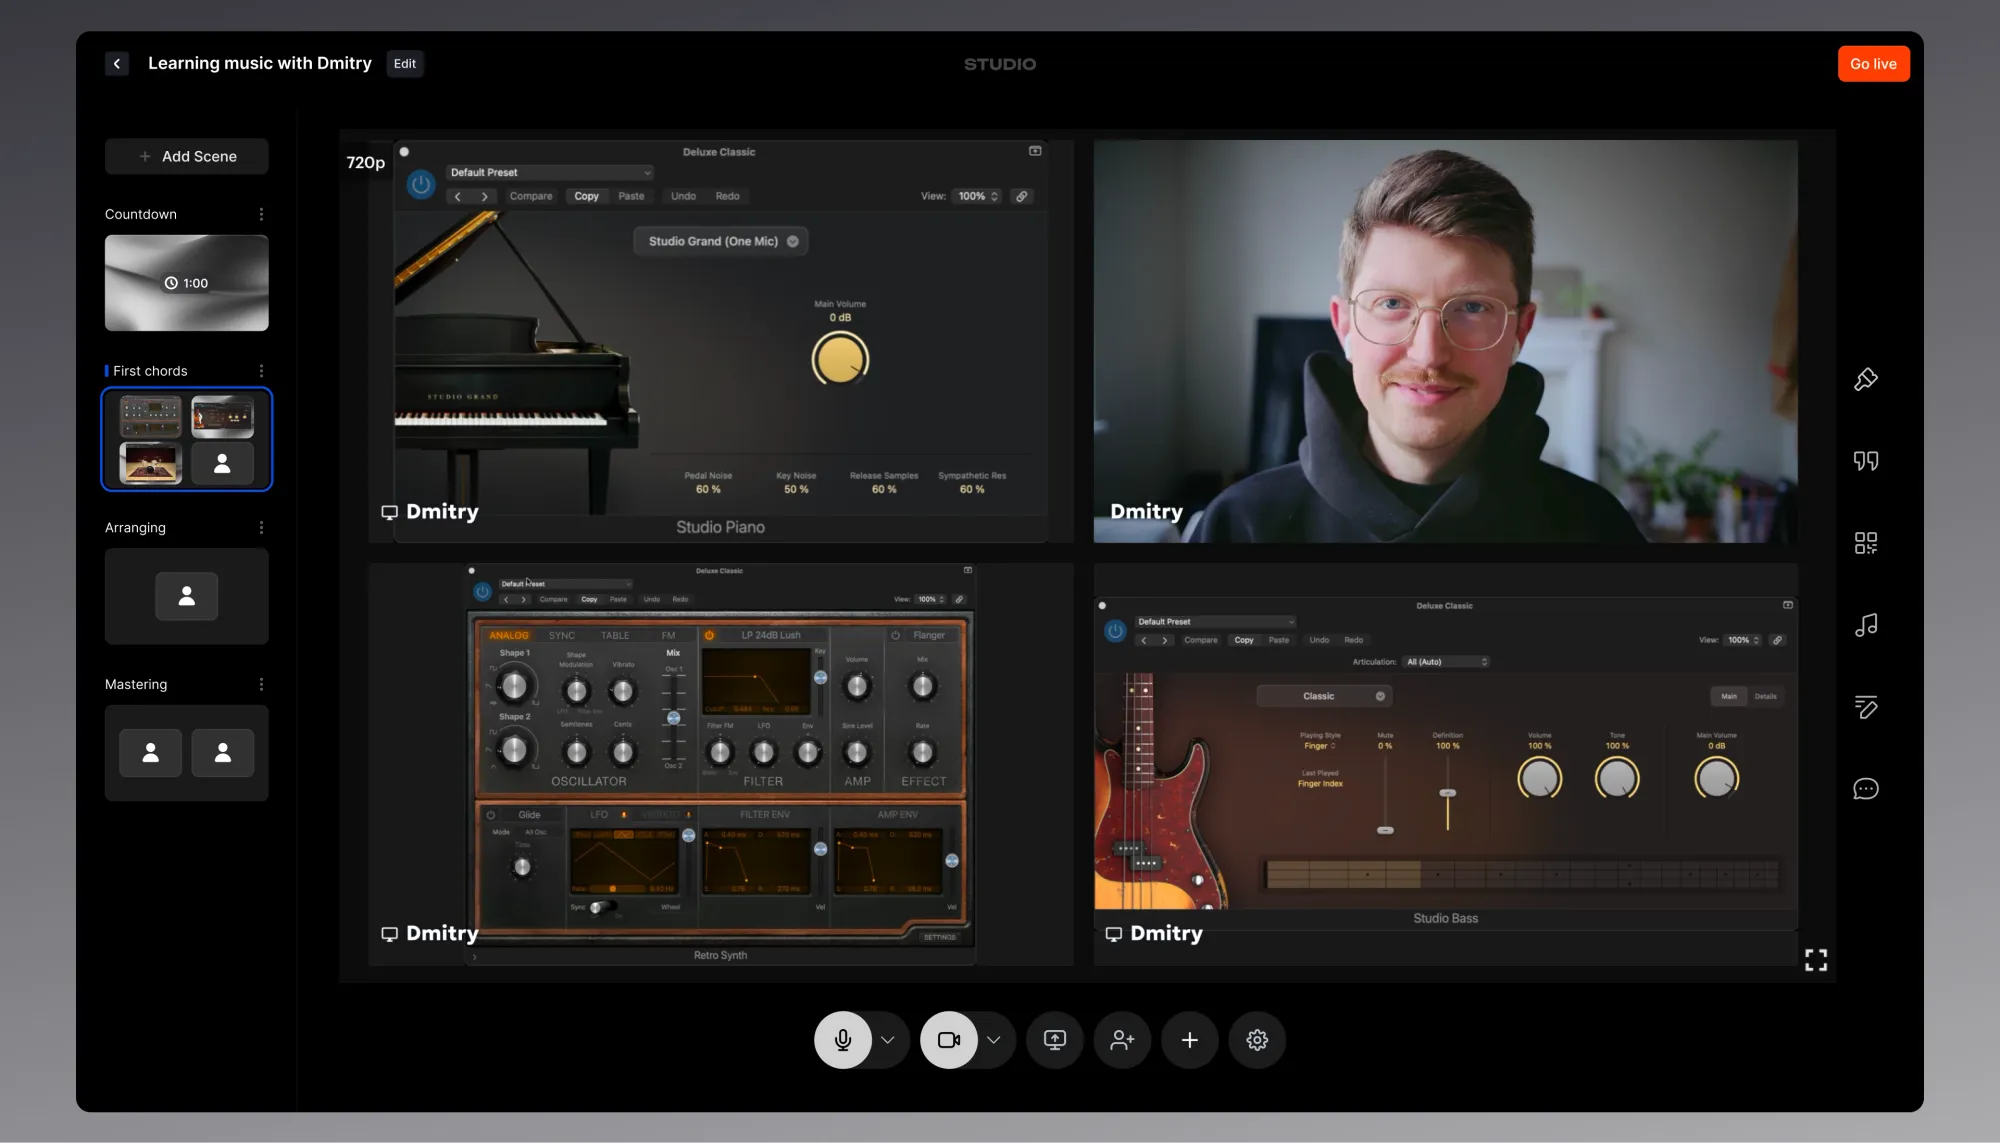
Share up to 3 screens at once
Before, you could only share one screen per scene. Now, share up to 3 screens at the same time in your Restream Studio.
Perfect for comparing sources, showing multiple tools, or streaming across monitors like you actually work.
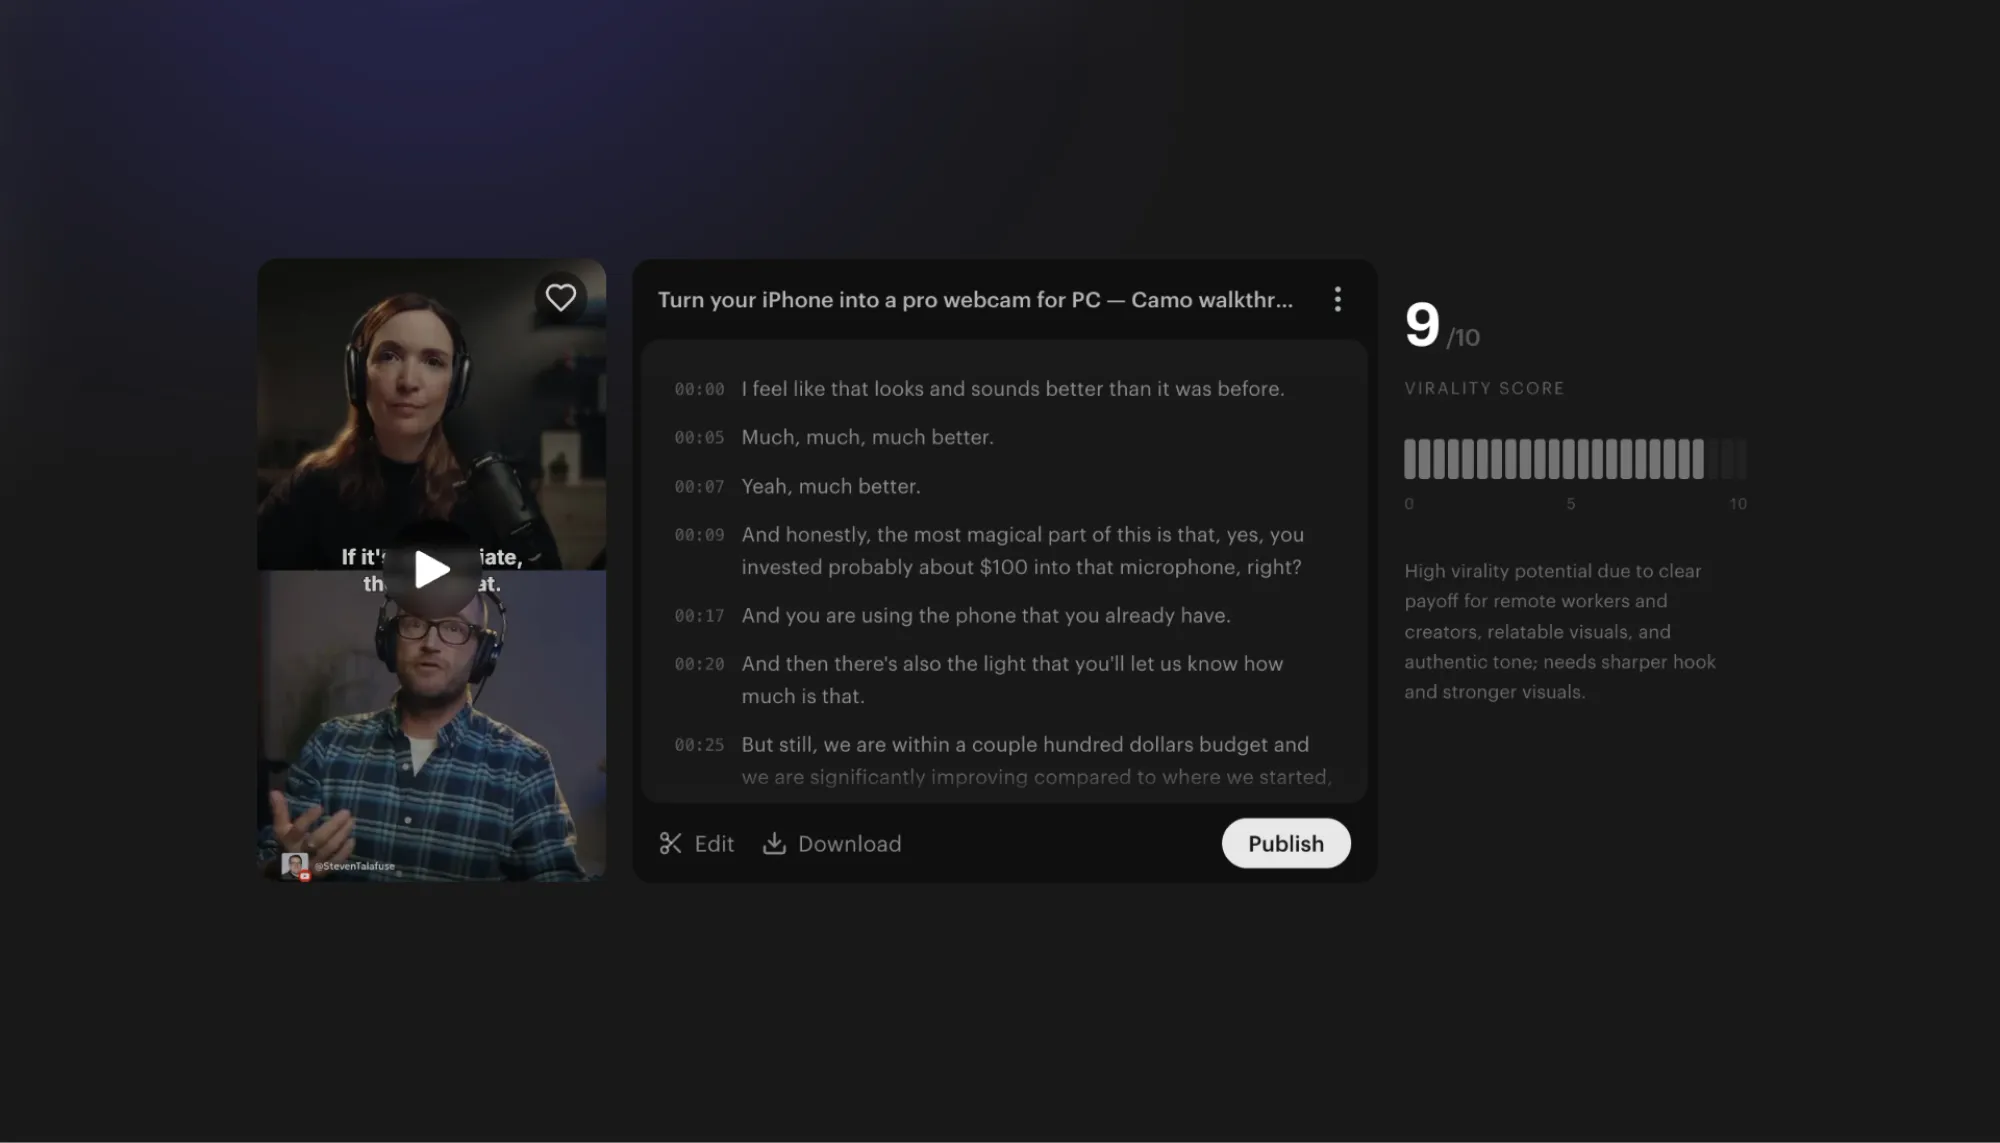
Refreshed Clips experience
We’ve refreshed the Clips interface with a cleaner design, smoother animations, and polished visual details across your projects and folders. Every clip comes with virality descriptions, timestamped transcripts, and a clear view of which channels each clip has been posted to.
Find all channels info in one place
We’ve rolled out a brand-new Channels page to make managing your destinations simpler and faster. You can now:
- Easily manage all your channels in one place
- See recent streams per channel at a glance
- Quickly find everywhere a channel is enabled to go live
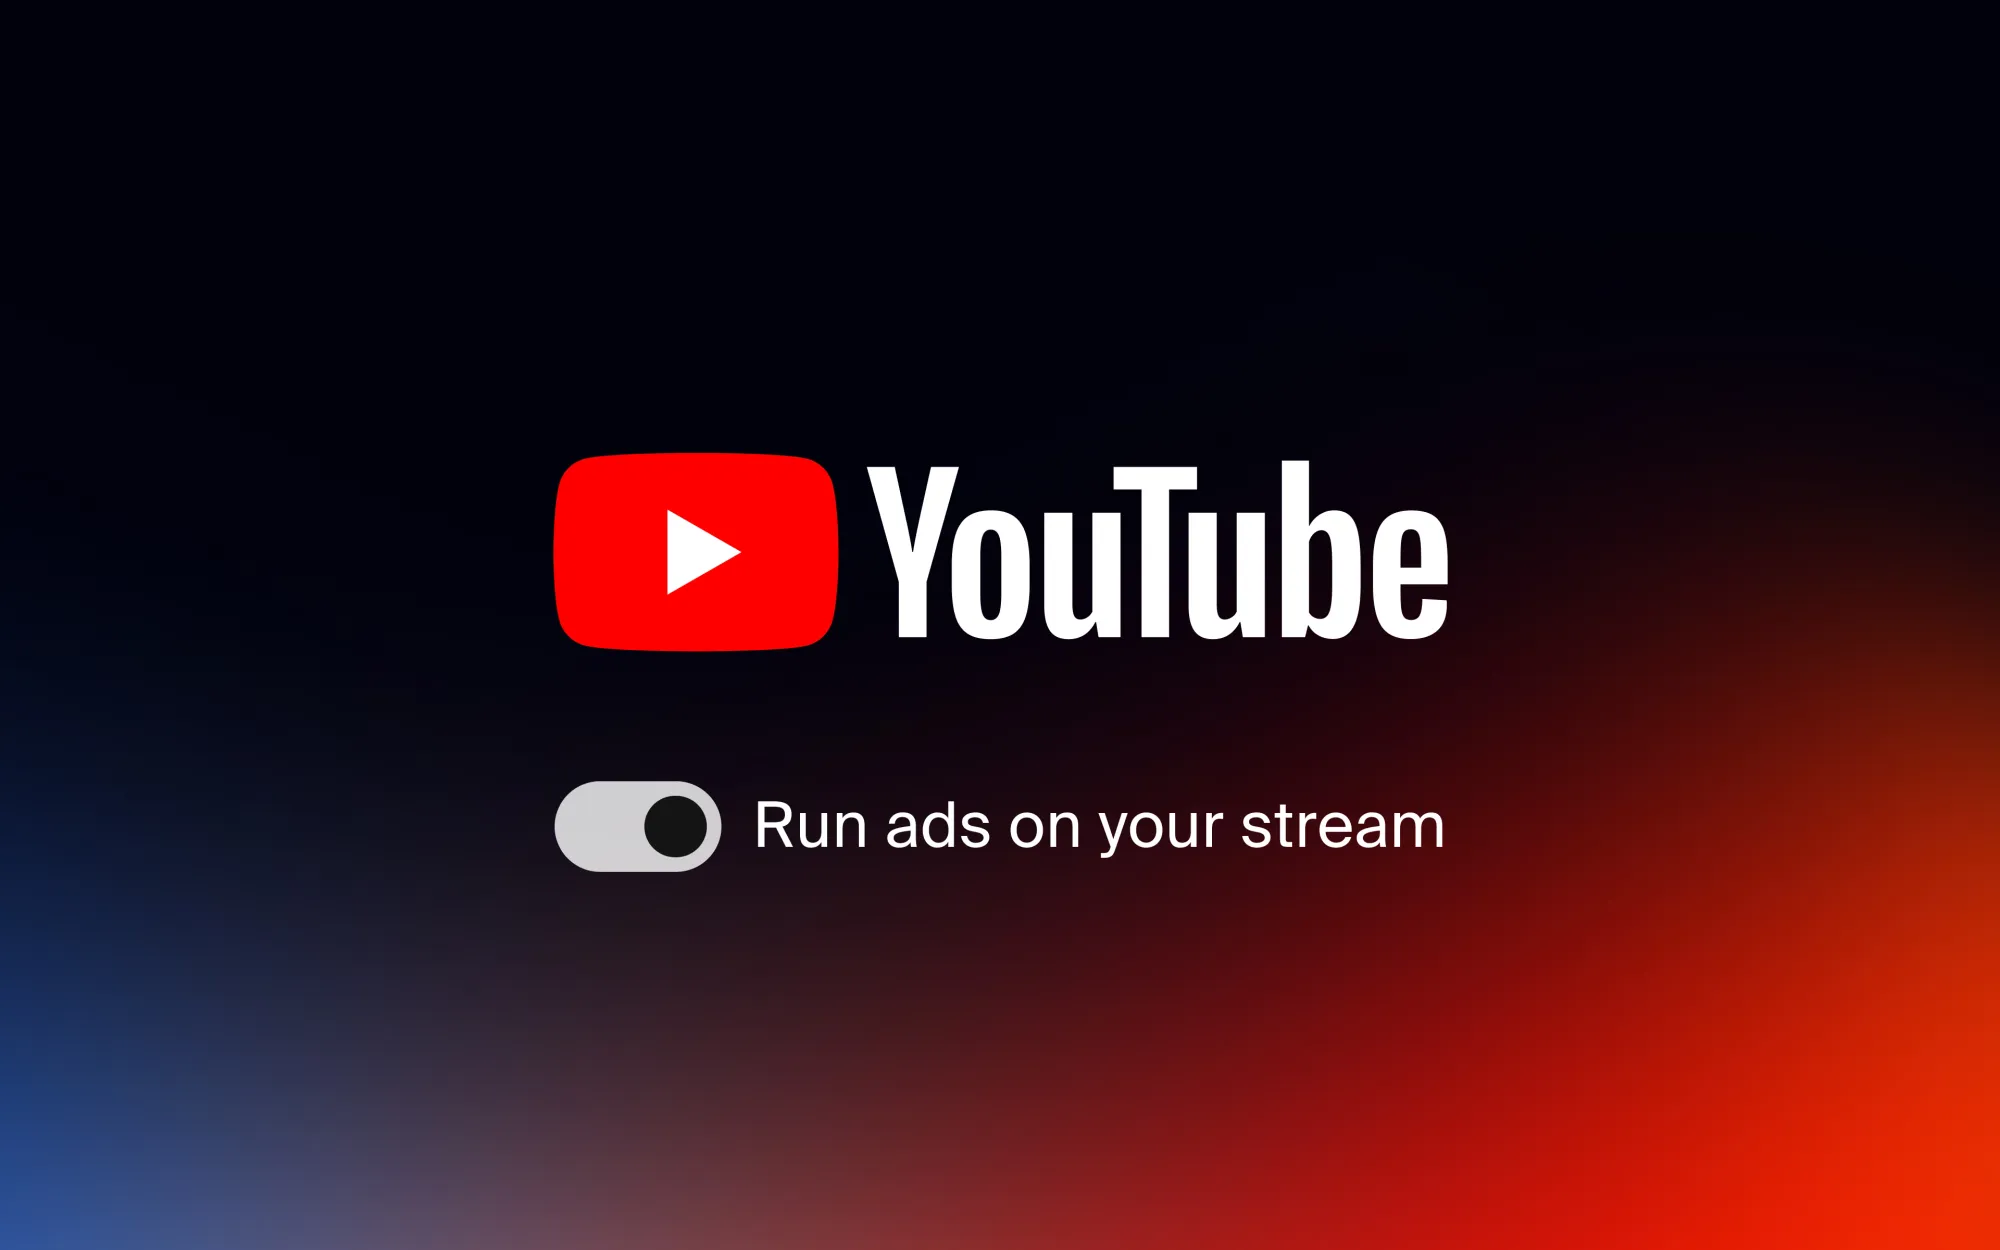
Monetize your streams on YouTube
Now you can enable YouTube live stream ads directly from Restream, and even set the frequency.
- To start, ensure you have access to monetization on your YouTube channel.
- Go to any stream setup, edit YouTube, and enable monetization. Learn more.
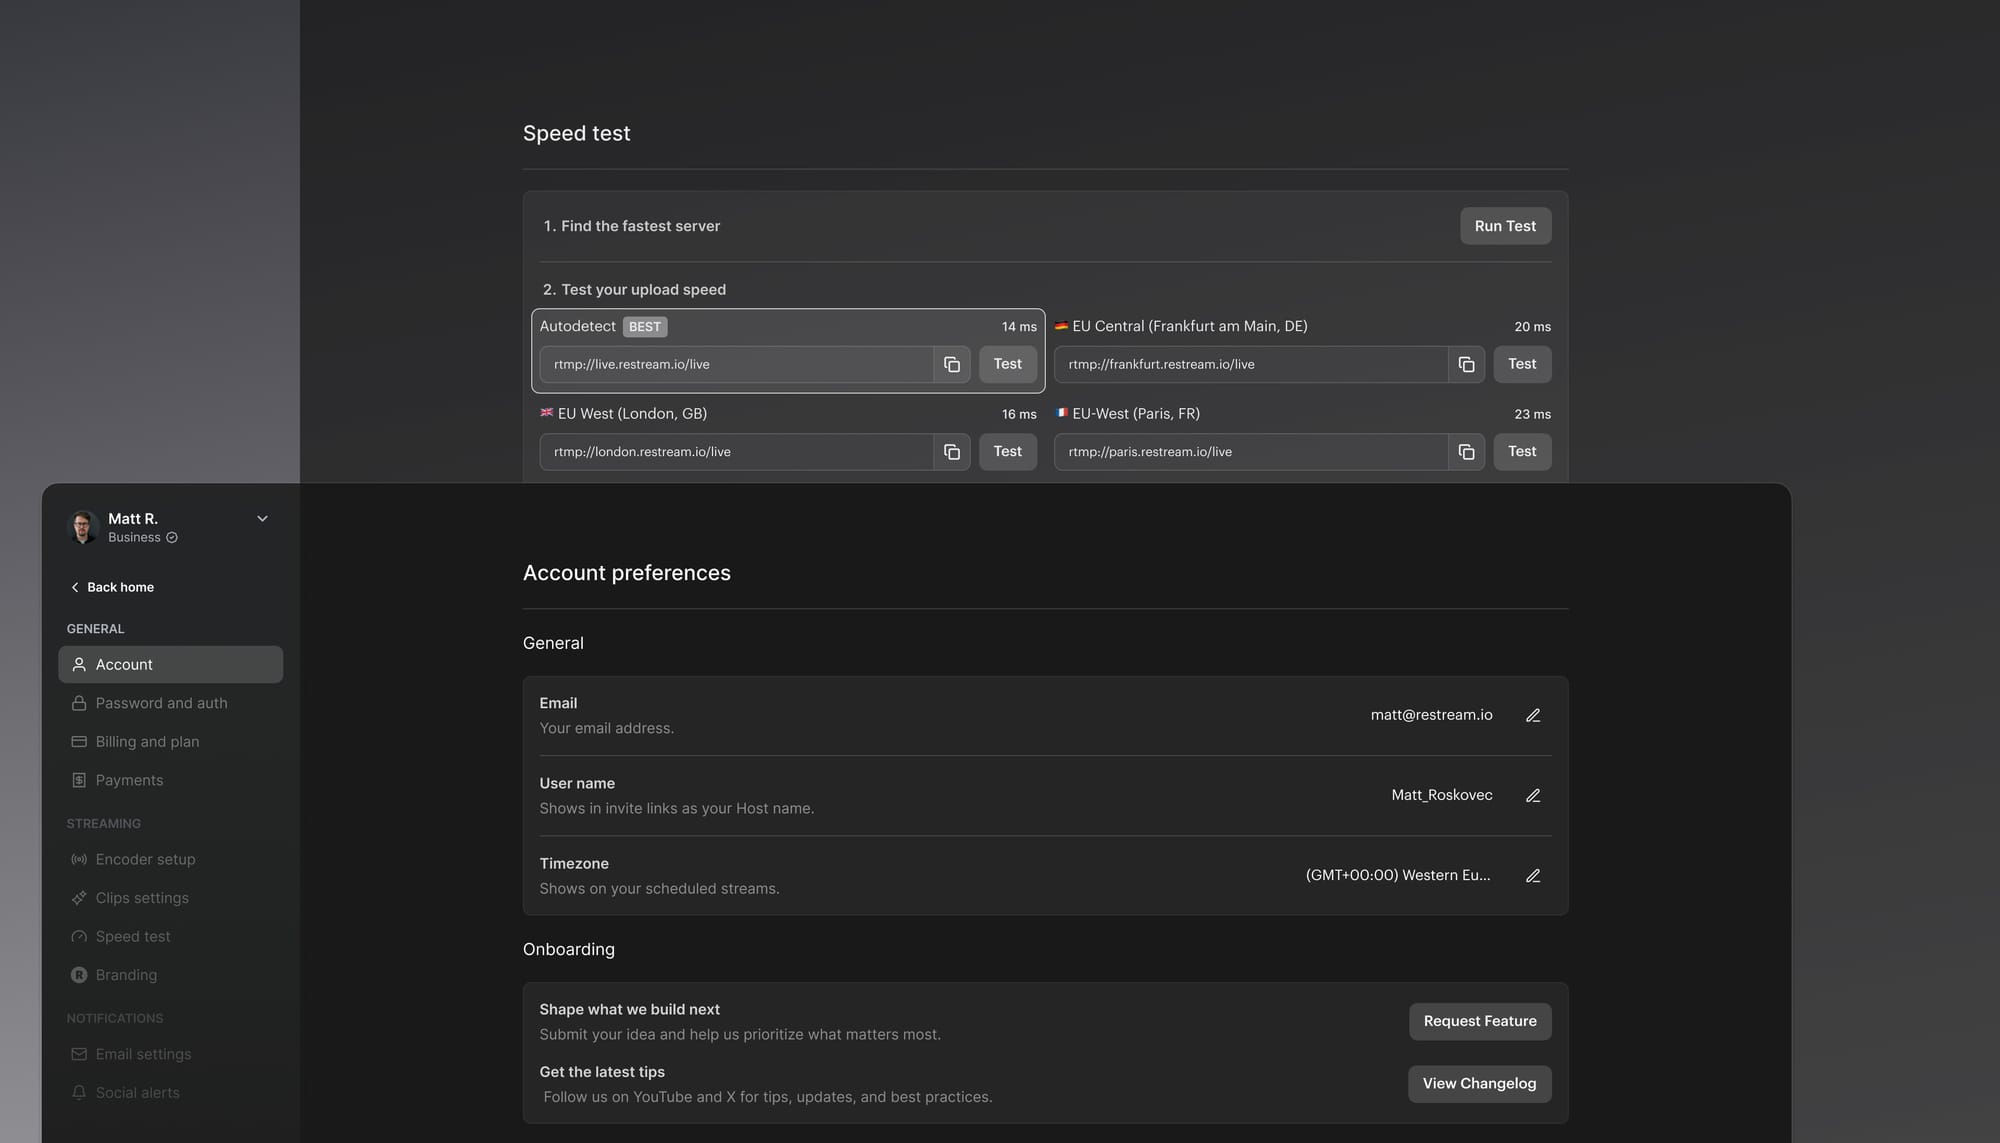
Manage your settings with confidence
Settings are now cleaner, faster, and easier to navigate — so you can quickly check your stream readiness. What’s new:
- Unified design across settings for a more consistent experience.
- Settings for Organizations are now available in the account dropdown.
- Improved Speed Test page with clearer, more indicative results.
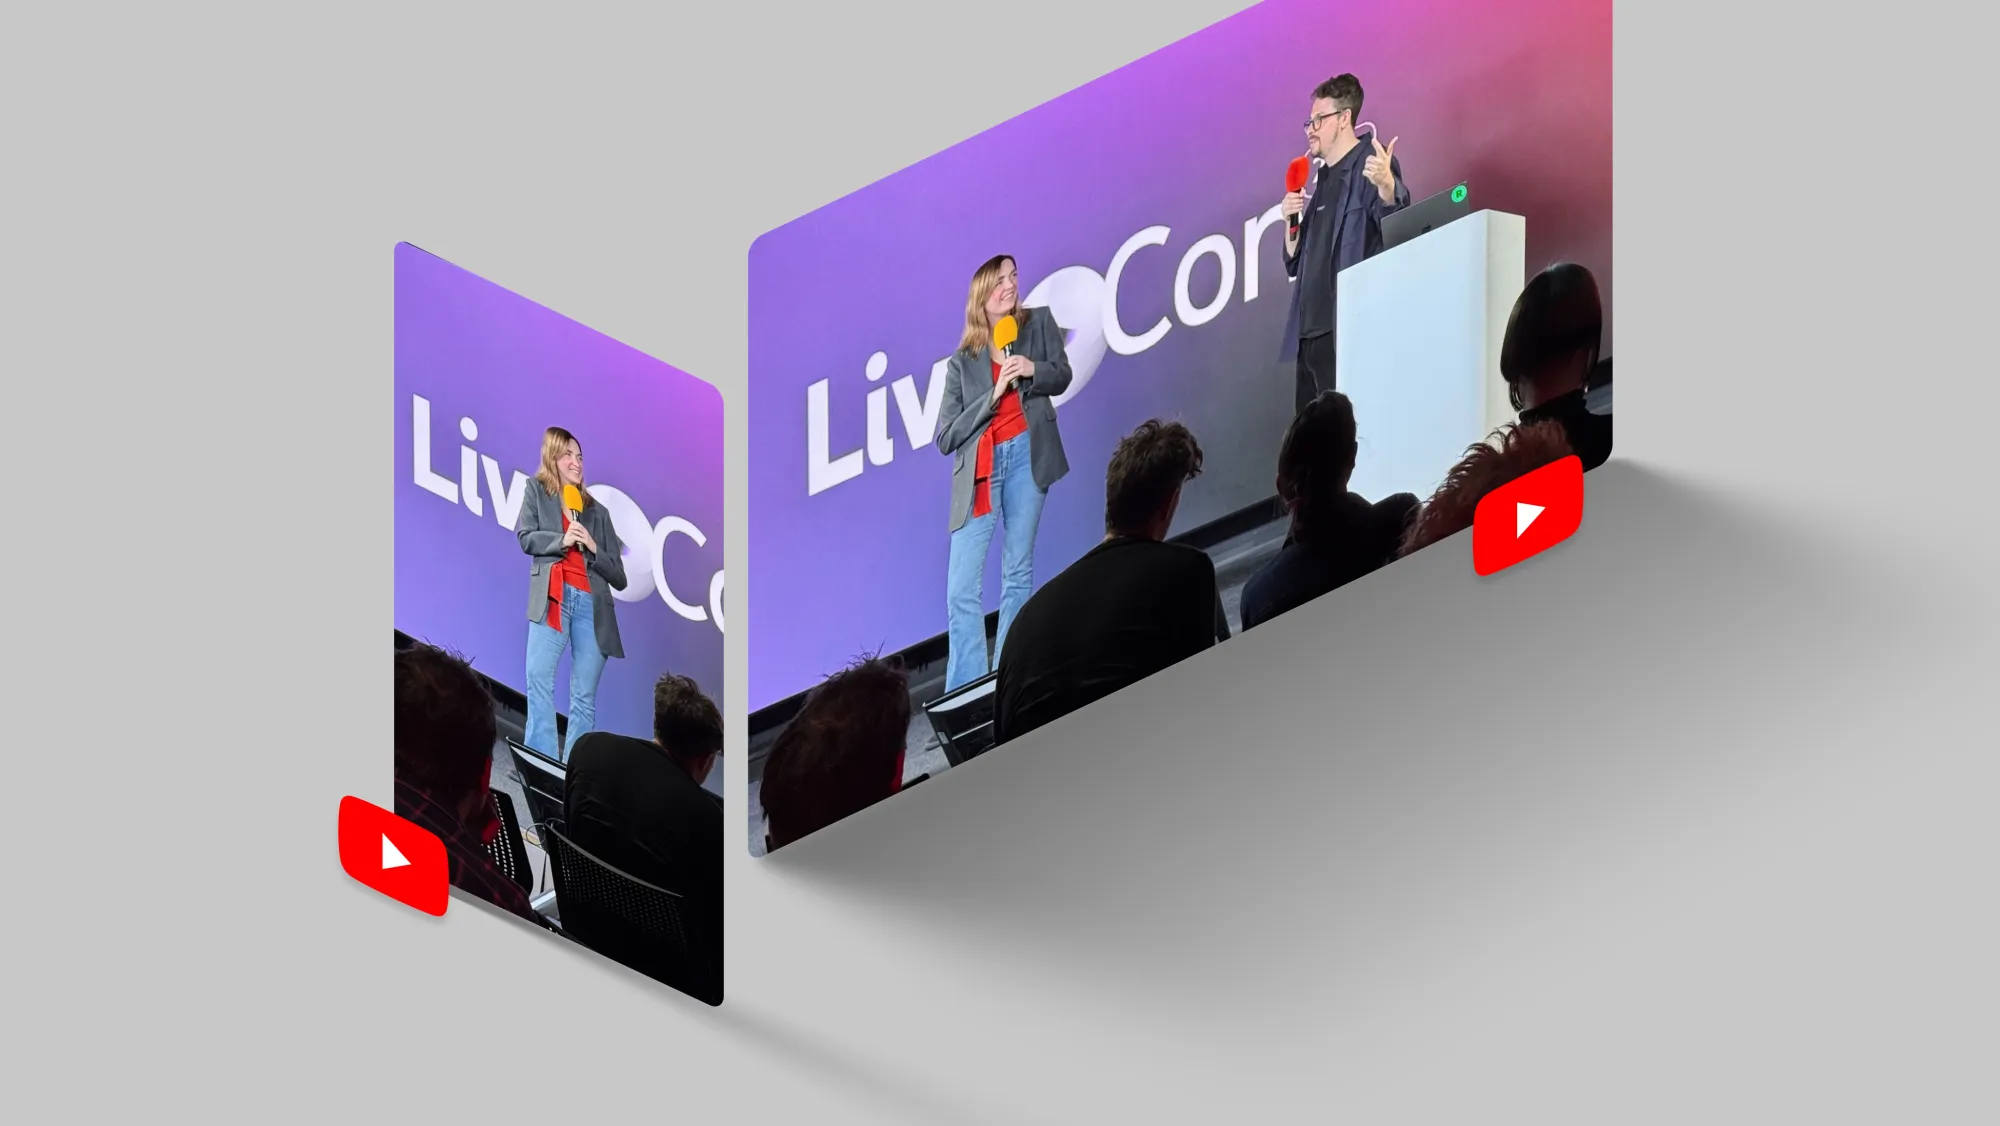
Stream vertical and horizontal on the same YouTube channel
Set the stream orientation in YouTube channel settings to Landscape + Portrait. Then go live in both formats at the same time from OBS using Restream’s free Vertical plugin.
- Audio from OBS stays in sync.
- Two YouTube events go live from one stream.
- See live chats from both streams in one place.
Why it matters
- Reach new fans in vertical feeds.
- Give mobile and desktop viewers the best experience.
Stream to custom WHIP channels (Beta)
Go live on any platform that supports WHIP. It works just like streaming to Custom RTMP or Custom SRT channels — but is designed for low-latency, WebRTC-based streaming.
Stream to custom HLS channels
You can now broadcast to any platform that accepts HLS ingestion. HLS supports advanced codecs like HEVC (H.265) and HDR, delivering more realistic, vivid video quality with greater color depth and contrast.
To get started, add a new channel, paste your HLS URL, and start streaming.

New Guest view
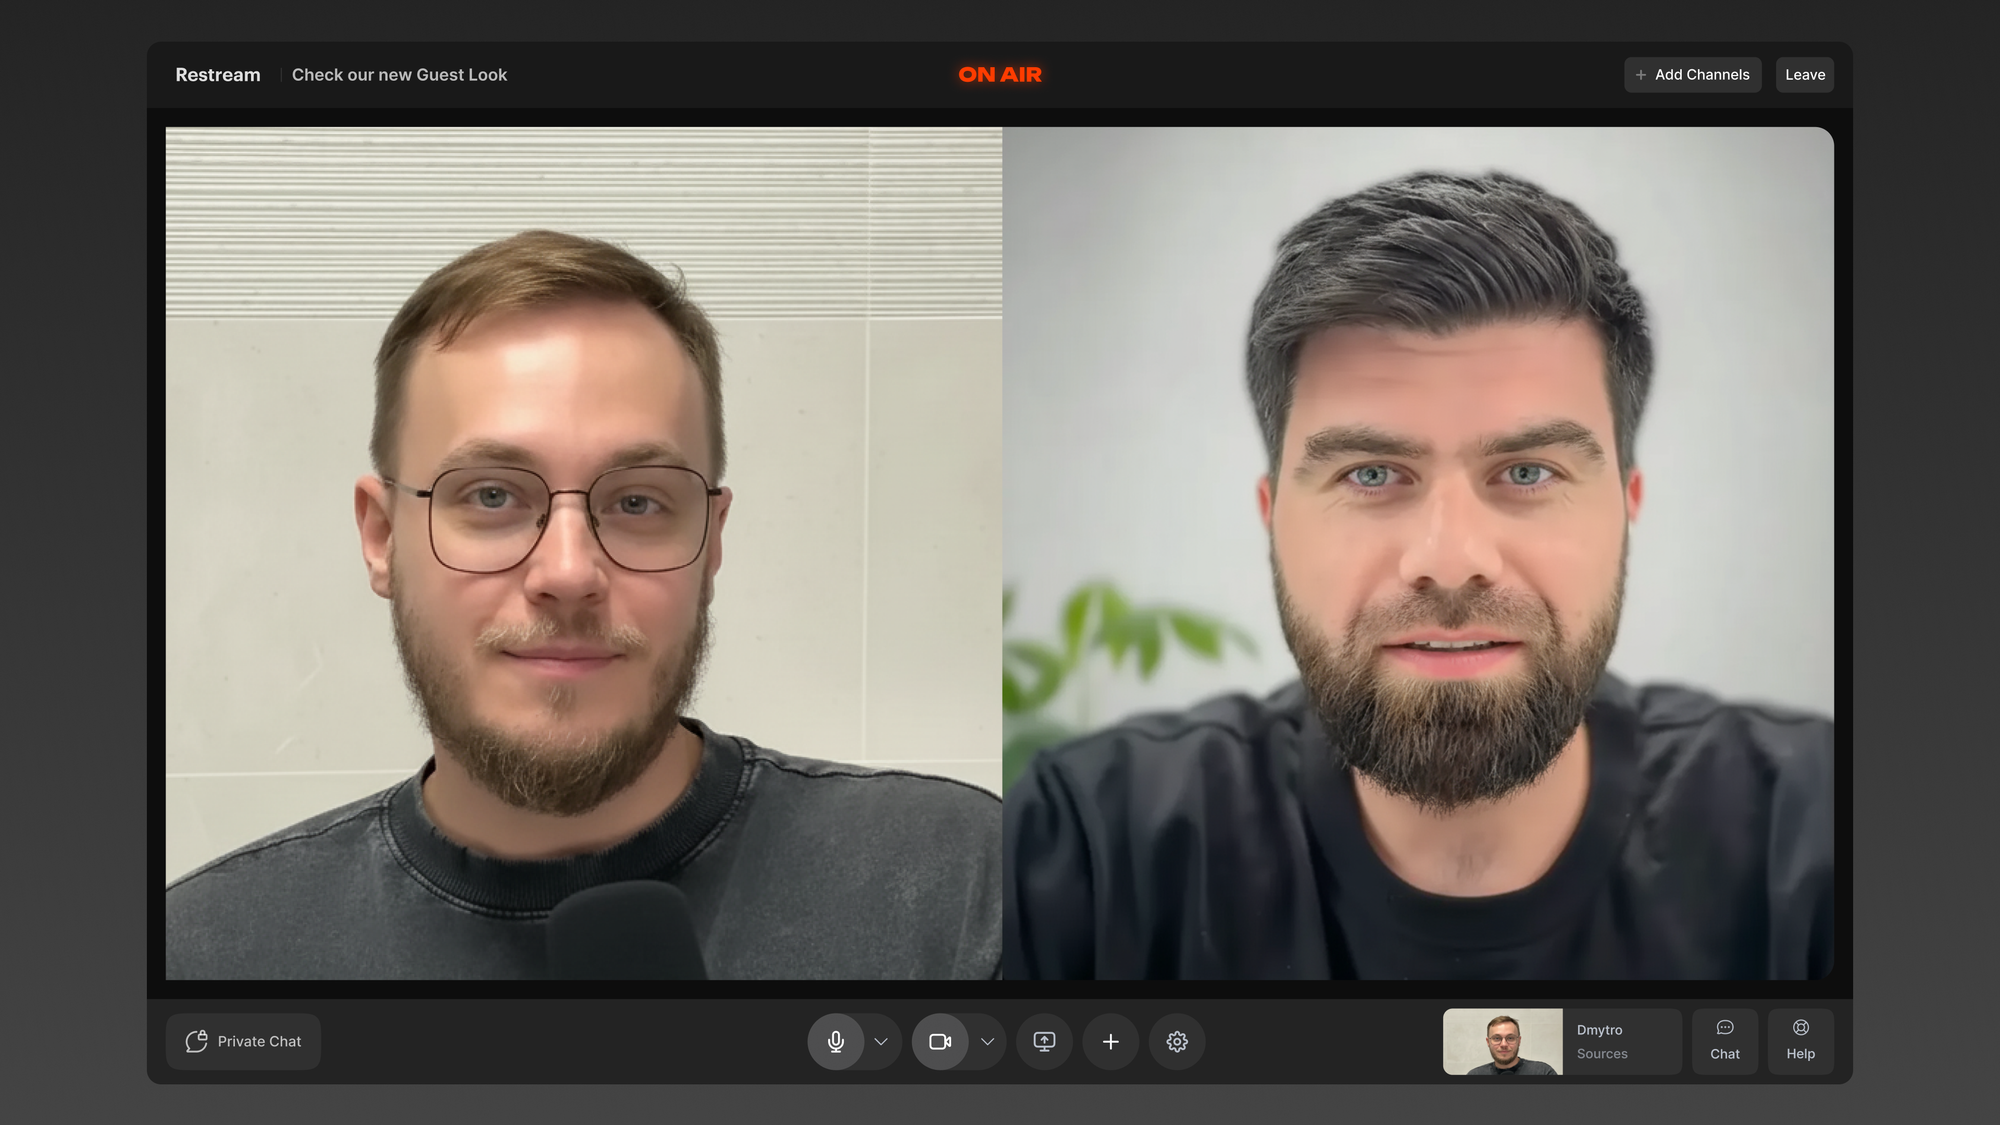
Your guests now see a clean, simple canvas when joining Studio:
- All controls now sit in a fixed bottom bar and open as tabs (Sources, Chat, Help, and Private chat)
- ON AIR tag appears in the header that tells your guests they’re live and visible to viewers.
- Cleaner Waiting for Host and Host Joining states.
Keep speakers focused on their message — and make it feel good to be your guest.
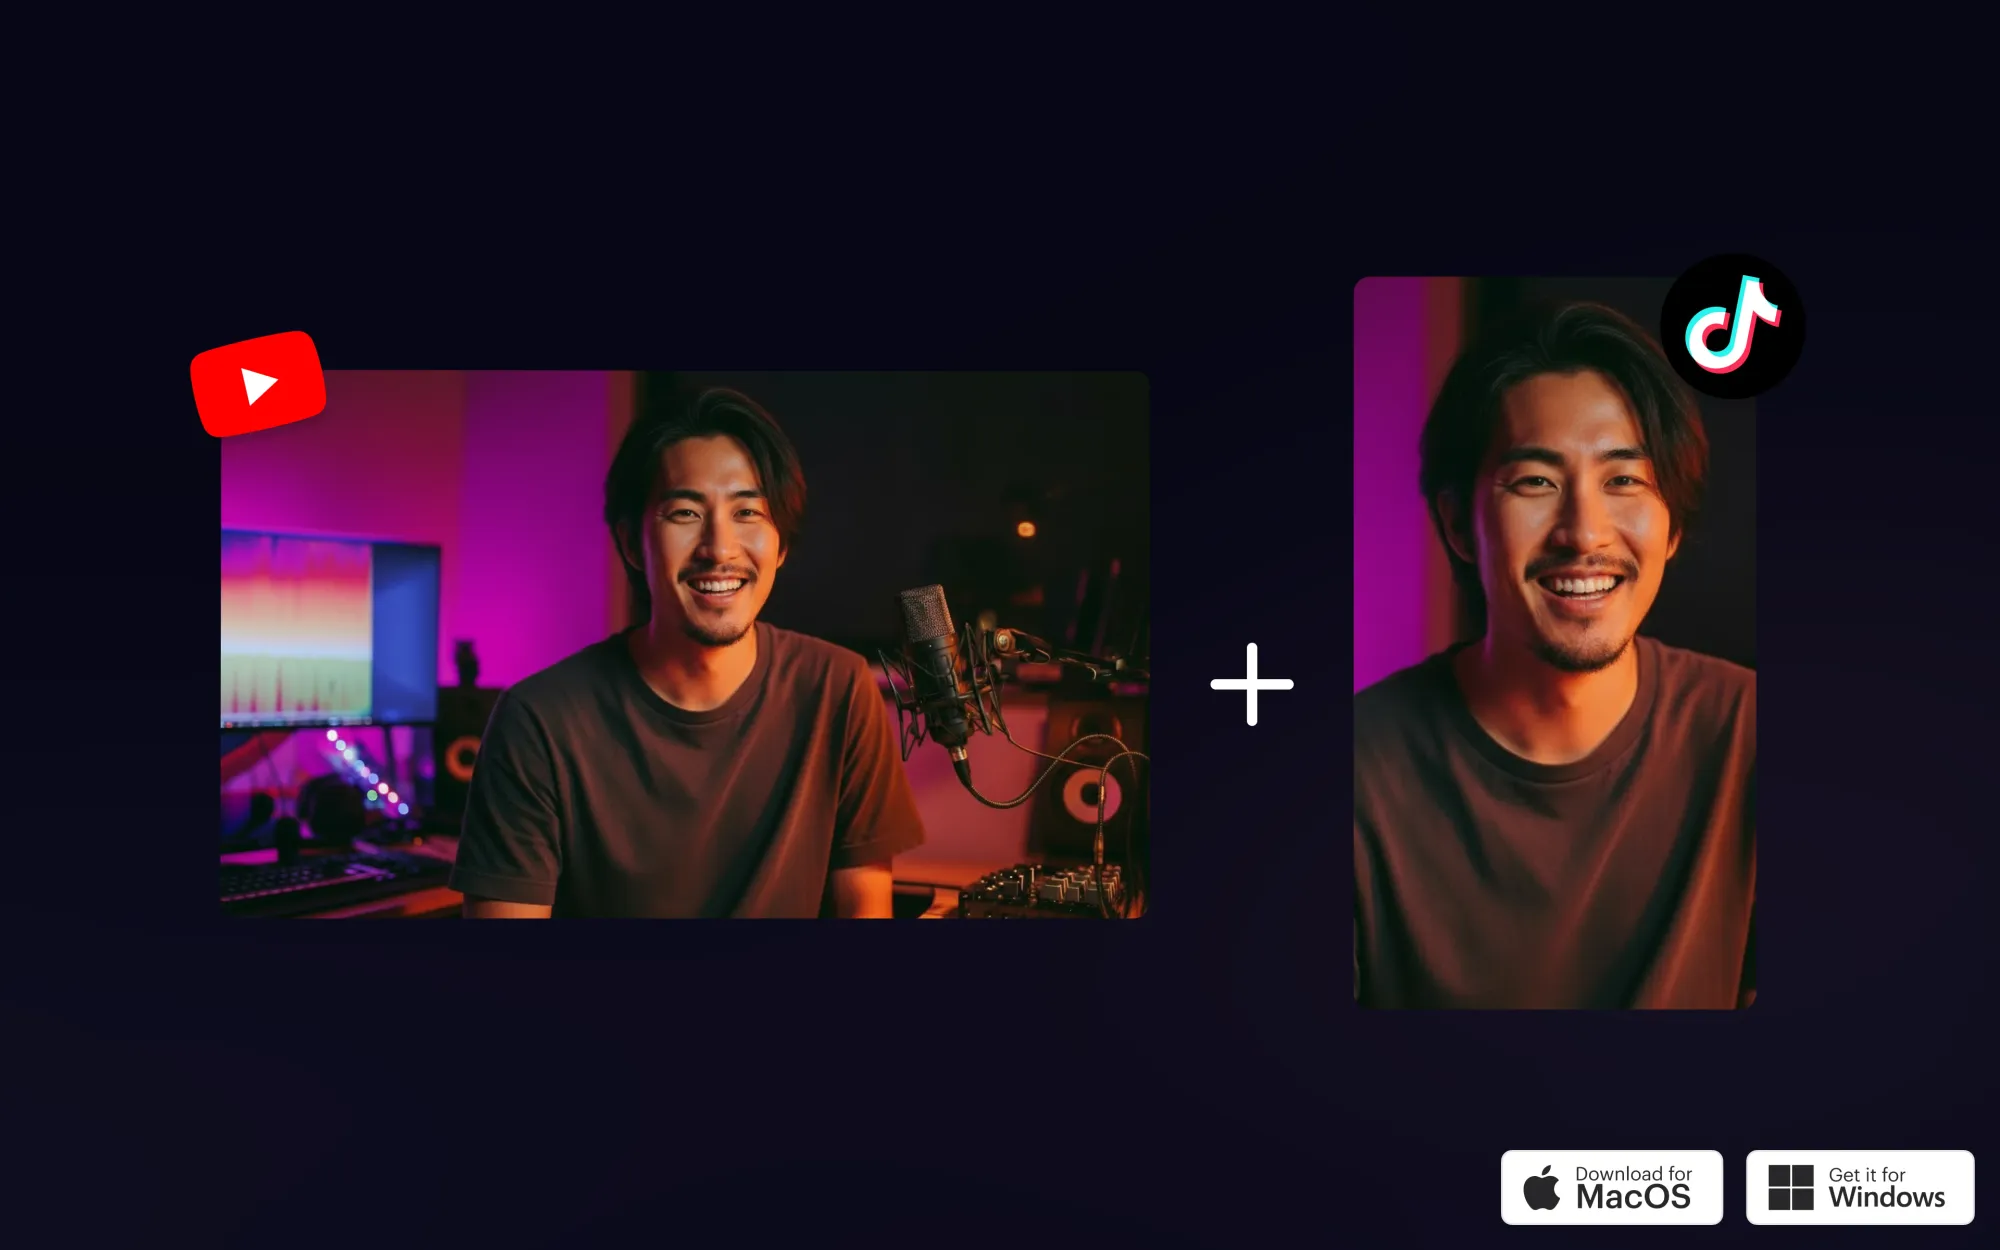
Stream via Dual Output from OBS
Install the Restream Vertical OBS plugin for MacOS or Windows to stream in vertical format to platforms like TikTok, YouTube, or Instagram — while sending a horizontal stream to other channels. Learn more.
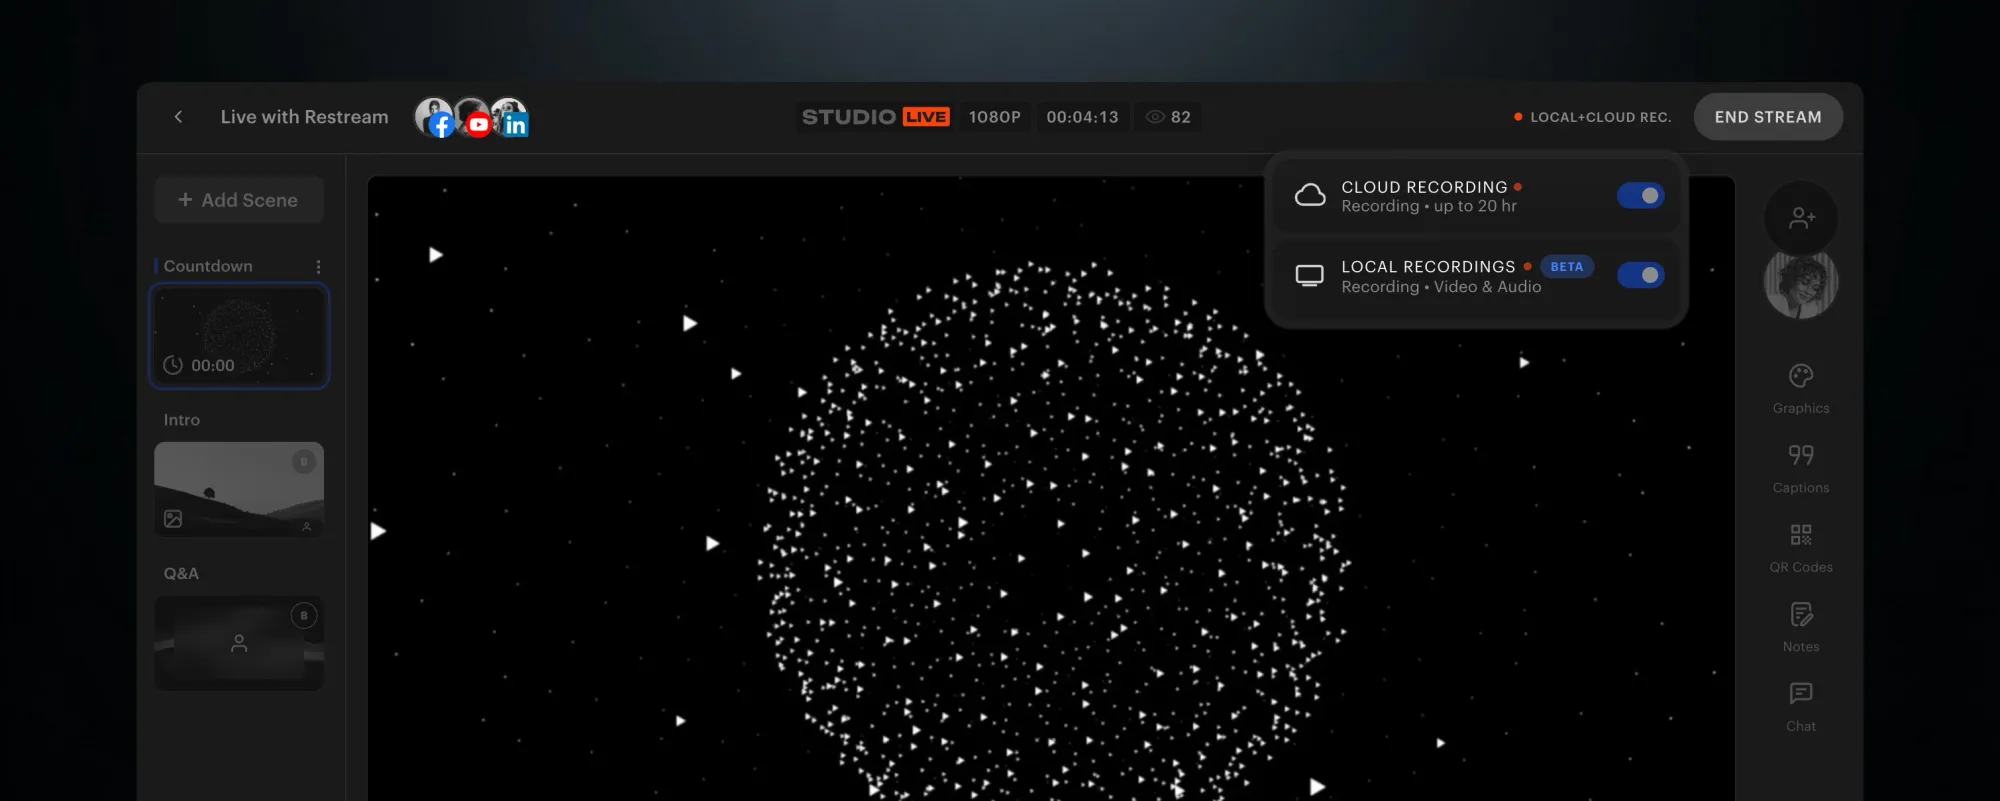
Record locally in Studio (Beta)
Get studio-quality recordings every time, even when your guests have spotty internet.
With local recordings, every participant records their video and audio on their own device, capturing up to 4K quality no matter their connection.
Why you’ll love it:
- Consistent quality: Your recordings stay perfect even when a guest’s connection drops.
- Easy for guests: Speakers’ files upload automatically. No chasing, no sharing Drive links, no missing recordings
- Edit faster: Get separate tracks for each speaker plus full project files for Premiere, Final Cut, and more
Local recordings are perfect for podcasts, interviews, webinars, and any content where quality matters. Learn more.
Prepare your stream look with placeholders
Want to see how your stream will look once all your guests join, so you can prepare the layout for every scene in advance? Now you can — with participant placeholders.
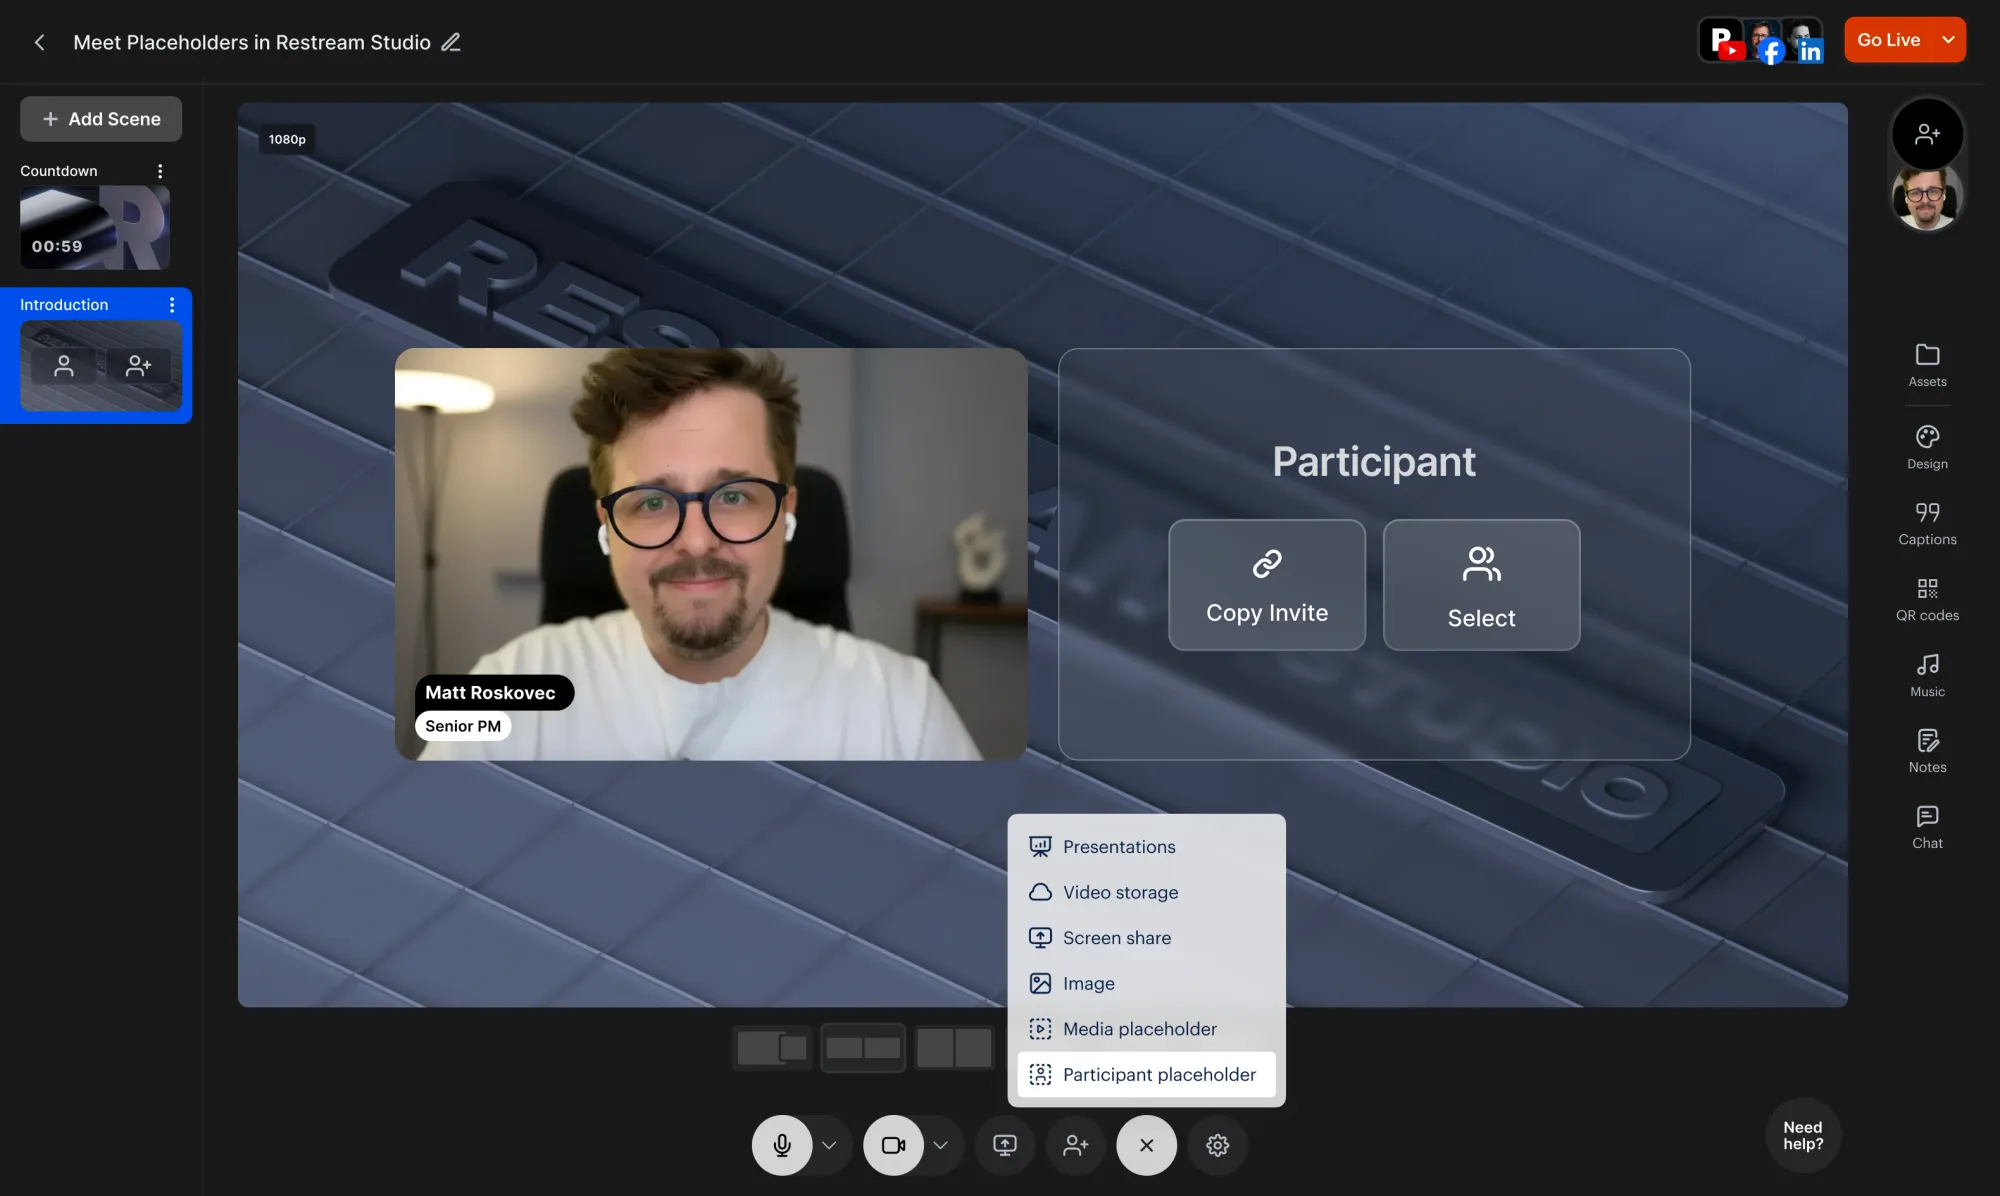
✨ How it works
- Click the ➕ button at the bottom of Studio to add a participant placeholder.
- Add up to 10 placeholders per scene (depending on the layout).
- When you toggle a participant on air, they’ll automatically fill the first available placeholder.
- If all placeholders are taken, new participants will appear as usual.
- Copy Invite button copies same link for all the guests.
Let your content shine in Dark mode
We’ve redesigned the product interface to highlight what matters most — your stream, front and center.
Enjoy a sleek, modern look that lets your content shine. With a refined monochrome palette and subtle, distraction-free controls, you can focus entirely on creating. Stream, produce, and collaborate in a space that’s effortlessly stylish and easy on the eyes.
Move and resize countdowns
Customize your countdown timer so it fits seamlessly with your video background and brand style.
- Move it: Drag and position your countdown anywhere on the canvas to match your stream’s vibe. Guidelines help you stay perfectly centered.
- Resize: Go beyond the three predefined sizes — click and grab the corners to scale it exactly how you want.
Assign participants to scenes
Structure your Studio stream by showing speakers on certain scenes while hiding them on others.
How it works:
- Once everyone has joined, go to Sources.
- Click All scenes and select the specific scenes where you want each participant to appear.
- When you switch between scenes, participants will automatically be shown or hidden based on your settings.
To bring participants on air at any point, just toggle them on.
Refresh your captions with the new Air theme
Our new Studio theme — Air — brings a brighter, cleaner look to your streams, enhancing captions (lower thirds and tickers), name labels, and chat highlights.
To try it out, open Design on the right side of Studio to switch themes, or simply create a new stream draft — Air will be applied automatically.